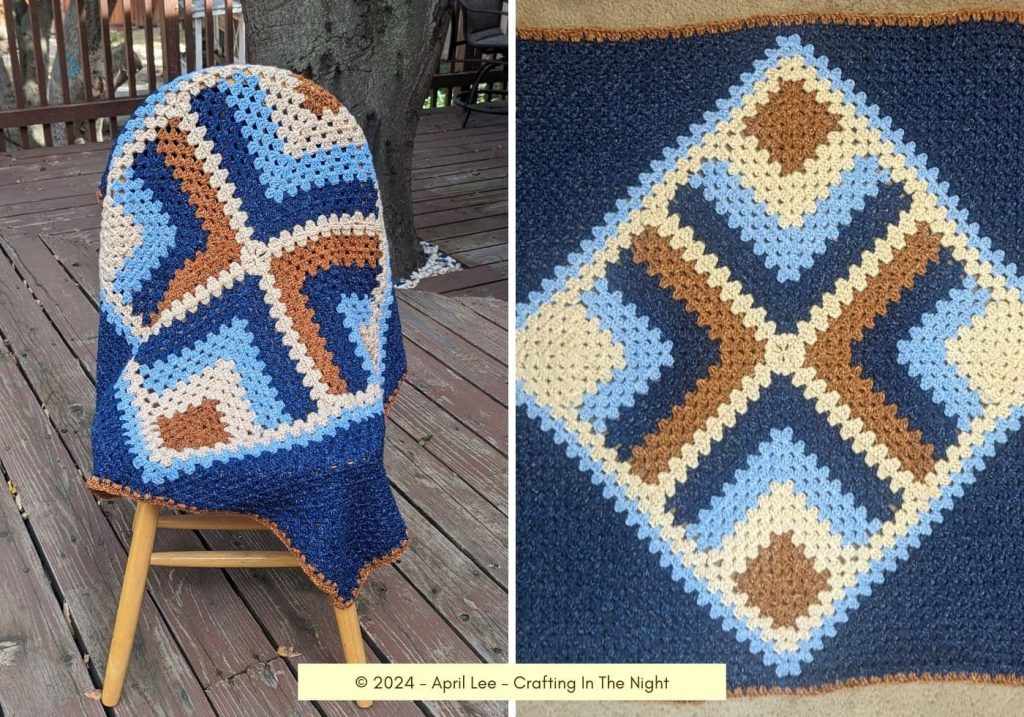
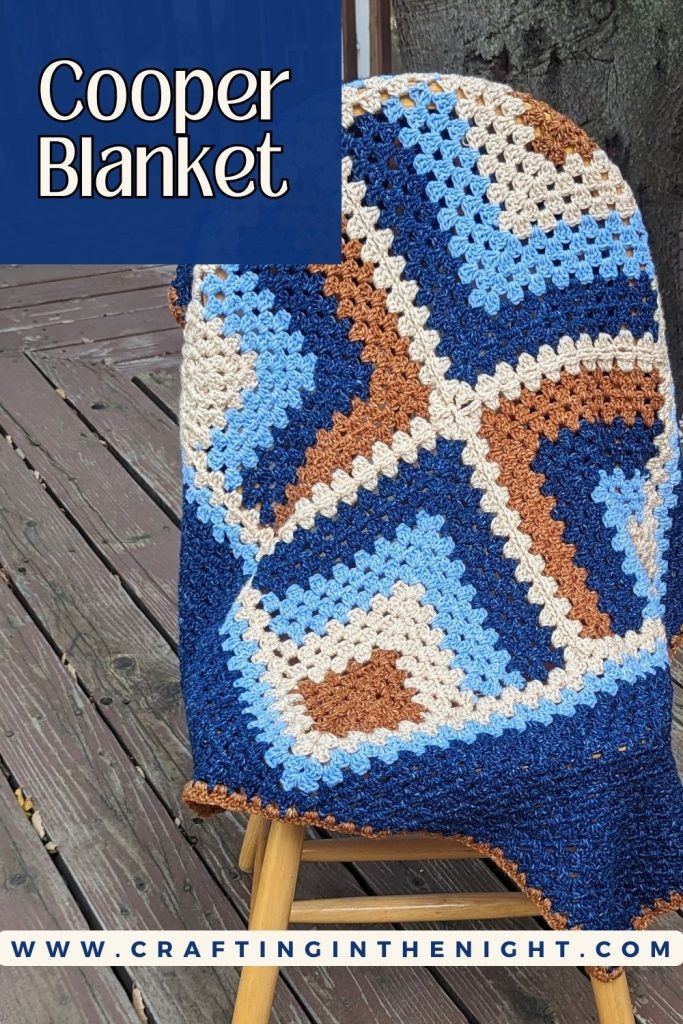
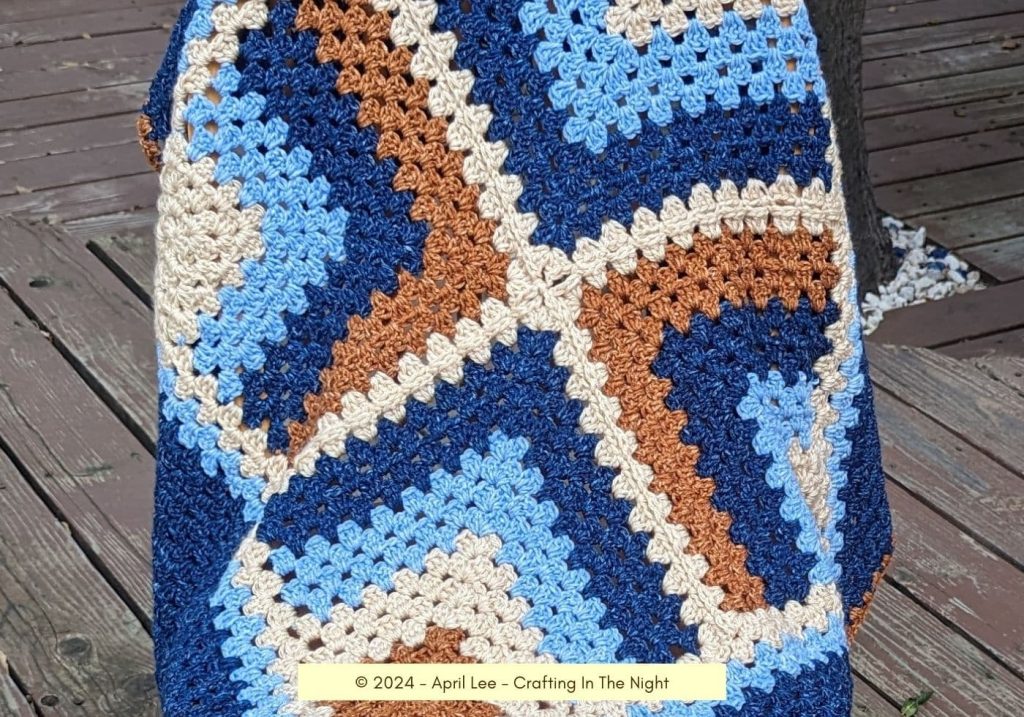
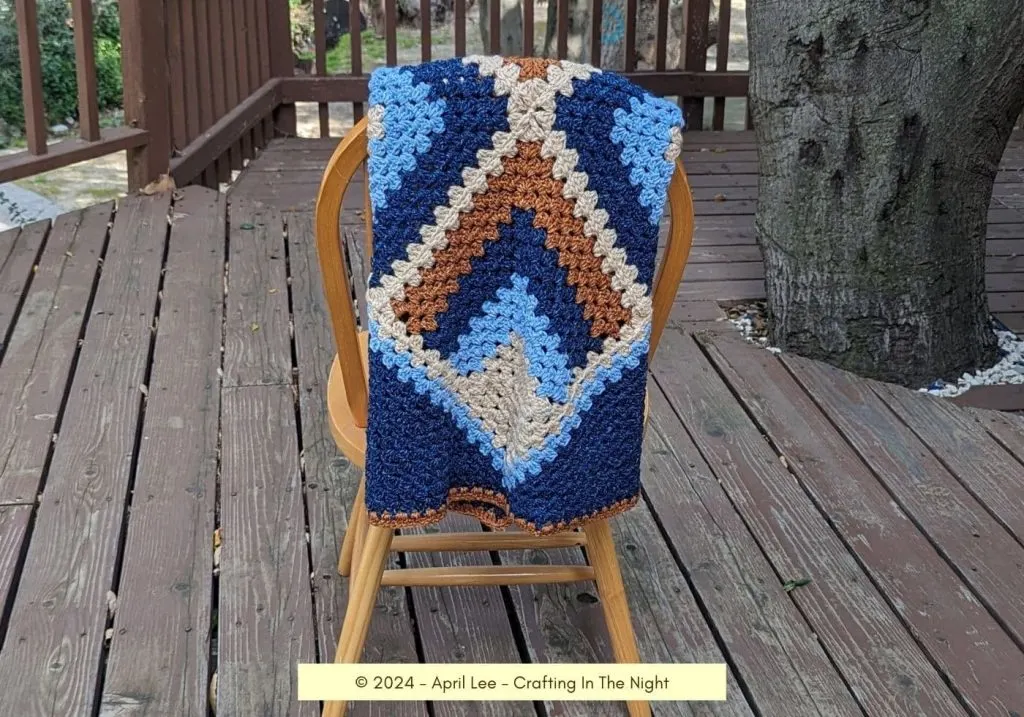
In the world of crochet, few designs are as beloved and timeless as the granny square. Its versatility and charm have made it a staple for generations of crafters. However, as with any classic, there’s always room for innovation and creativity. Today, I’m thrilled to introduce you to my latest project: the Cooper Blanket. This unique twist on the traditional granny square incorporates a delightful mix of techniques, including the classic granny square, mitered granny square, and corner-to-corner granny square, all beautifully blended into a four-color design.
Perfectly sized for a cozy baby blanket or a thoughtful donation to those in need, the Cooper Blanket not only showcases the beauty of crochet but also embodies the spirit of community and generosity. Join me as we explore the inspiration behind this project and the techniques that make the Cooper Blanket a standout piece in any crochet collection!

Crochet Skills Needed
This pattern is suited for an advanced beginner. You’ll have the most success with this pattern if you are familiar with the following concepts:
- Making a Granny Square
- Join As You Go (JAYG) Technique for Joining Squares
This pattern uses all granny cluster stitches. Aside from the traditional granny square that starts our project, I’ll walk you through the concepts of a mitered granny square and the corner to corner granny stitch.
Materials
- Main Color (MC) – Lion Brand Jeans – Classic – 3 balls
- Contrast A – Lion Brand Jeans – Faded – 1 ball
- Contrast B – Lion Brand Jeans – Top Stitch – 1 ball
- Contrast C – Lion Brand Heartland – Acadia 1 ball
- Size I (5.5 mm) Crochet Hook (I use this set)
- Yarn Needle
If you are using a thicker worsted weight yarn (like I Love This Yarn, Red Heart Super Saver, or Caron One Pound) you’ll need the following:
- Main Color (MC) – ~450 grams
- Contrast A – ~100 Grams
- Contrast B – ~100 Grams
- Contrast C – ~120Grams
- Size J (6.0 mm) Crochet Hook (I use this set)
- Yarn Needle
💡 Tip: This is a great scrap yarn project. Use a digital scale (like this one on Amazon.com) to weigh your scrap yarn.

Terms & Abbreviations
- Granny Cluster: Three double crochets worked into same space.
- MC: Main color
Video Tutorial
Cooper Baby Blanket Pattern
- Finished Size: 40″ x 40″
- Skill Level: Advanced Beginner
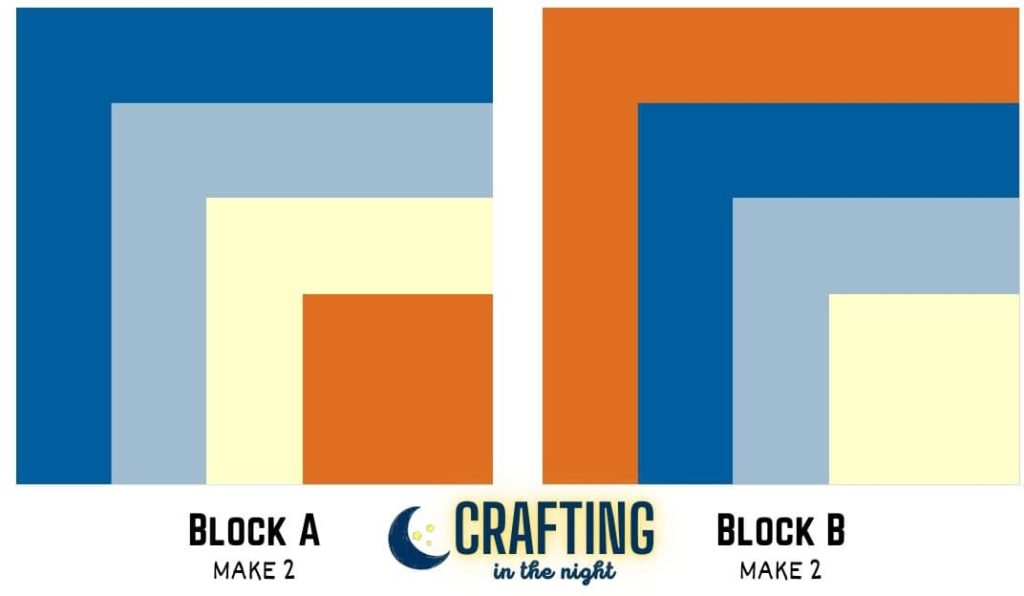
Blocks – Make 4 Total
Each block or row uses four rounds or rows of the color before switching to the next color.
- Make 2 in the color sequence: C, A, MC, B
- Make 2 in the color sequence: B, C, A, MC
With C make a magic circle.
Row 1: Chain three, work 2 double crochets into circle. Chain 3 and 2 double crochets counts as your first granny cluster now and throughout. *Chain 1. Work granny cluster into circle. Repeat from * 2 more times. Chain 1 and join with slip stitch to top of starting chain 3. Round one should have a total of four granny clusters and four chain 1 spaces.
Row 2: Chain three and turn your work. Work 2 double crochets into chain 1 space. Chain1. Work Granny Cluster into same space. This forms your first corner. *Work granny cluster, chain 1, granny cluster into next chain 1 space.* Repeat from * two more times. Round two should have four corners formed consisting of a granny cluster, chain 1, granny cluster in each corner. Eight total granny clusters.
Row 3: Chain three and turn your work. Work 2 double crochets into the space between granny clusters. *Work 3 double crochet, chain 1, 3 double crochet in corner. Work granny cluster in space between granny clusters.* Repeat from * two times. Join with slip stitch to starting chain 3.
Row 4: Chain three and turn your work. Work granny cluster into each space between granny clusters. Work granny cluster, chain 1, granny cluster into each corner. End with a slip stitch to the starting chain three. Cut your yarn leaving a long enough tail to weave in ends. Pull yarn through last stitch and weave in ends.
Join color A to any corner chain 1 space with a slip stitch.

Row 5: Join next color with slip stitch into any corner chain 1 space. Chain 4 (counts as a double crochet and chain 1 now and throughout). Skip the first granny cluster and work a granny cluster into space between first two granny clusters. Work 2 more granny clusters in the spaces between the granny clusters from the row below. Work granny cluster, chain 1, granny cluster into the corner. Work 3 more granny clusters as before, working in between granny clusters from the row below. Chain 1 and double crochet into the corner.
Row 6: Chain 3 and turn your work. Work two double crochets into chain 1 space. Work a granny cluster into the space between granny clusters from the row below until you reach the corner. In the corner, work a granny cluster, chain 1, granny cluster. Then, continue working granny clusters down the side until you reach the corner. In the corner work a granny cluster.
Row 7: Chain 4 and turn your work.
Rows 6 & 7 are your repeat rows for the mitered granny square. You’ll switch colors every four rows (row 8 and 12) depending on which block you are making so:
Block A
- Rows 1 – 4: Contrast B
- Rows 5 – 8: Contrast C
- Rows 9 – 12: Contrast A
- Rows 13 – 16: Main Color
Block B
- Rows 1 – 4: Contrast C
- Rows 5 – 8: Contrast A
- Rows 9 – 12: Main Color
- Rows 13 – 16: Contrast B
💡 TIP: For row 16 your starting and ending points should have FOUR double crochets. The rest of the block is worked as normal.
Row 16: Chain 3, place 3 double crochets in same space (chain 3 counts as a double crochet, 4 double crochets in this corner). Work a granny cluster into the space between granny clusters from the row below until you reach the next corner. In the corner, work a granny cluster, chain 1, granny cluster. Continue working granny clusters down the side until you reach the next corner. Work four double crochets into the corner. Finish off your yarn and weave in ends.
I recommend weaving in the ends as you go. 8 total ends to weave in for these four blocks.
Joining Blocks
For this pattern, I used the join as you go technique (JAYG) to join the blocks which is what is described in the instructions below. You could, however, use any joining method you prefer. Squares are joined on the long edges as shown in the illustration below:
For the 1st block:
For the first block, you are going to add a granny cluster border with no joining at all. This can be a little tricky if it is your first time working a border on a mitered granny square. The video below is at the time stamp specifically for this step.
Using color D, join with slip stitch into the chain 1 corner space. Chain 3. Work 2 double crochets into same space. Work a granny cluster in each space between clusters along the side. Work 3 double crochets, chain 1, 3 double crochets in the corners. When you come back to the first corner, work 3 double crochets in the corner. Chain 1 and join with a slip stitch to the top of the starting chain 3.
For blocks 2 & 3 (JAYG on one side)
Blocks 2 and 3 use Join As You Go (JAYG) method along one side. Since we are joining mitered granny squares, these instructions will be written to start in the corner of the initial granny square however, you can technically add your joining color anywhere on your square.
See this timestamp in the YouTube video for instructions:
For block 4 (JAYG on two sides)
You’ll join this square similarly to blocks 2 and 3 however, you’ll join 2 sides instead of just one.
Border Round
After all four blocks have been joined, you’ll add a couple rows of border until the project is close to the width you want it to be when measured from corner to opposing corner.
Join color C in any corner space. Chain 3, work 4 double crochets into the same space (chain 3 counts as the first double crochet of your granny cluster). Work granny cluster in the space between clusters along the side. Work 5 double crochets into the corner. Repeat from * around. Join with a slip stitch to starting chain 3.
This gives you a great base and you can continue adding any additional border rounds you want.