I recently crocheted a new pattern I call the Sunset Dreams Baby Blanket, and I can’t wait to tell you all about it. This easy crochet blanket was a breeze to work up, thanks to the magic of self-striping yarn and the versatile corner-to-corner (C2C) stitch.

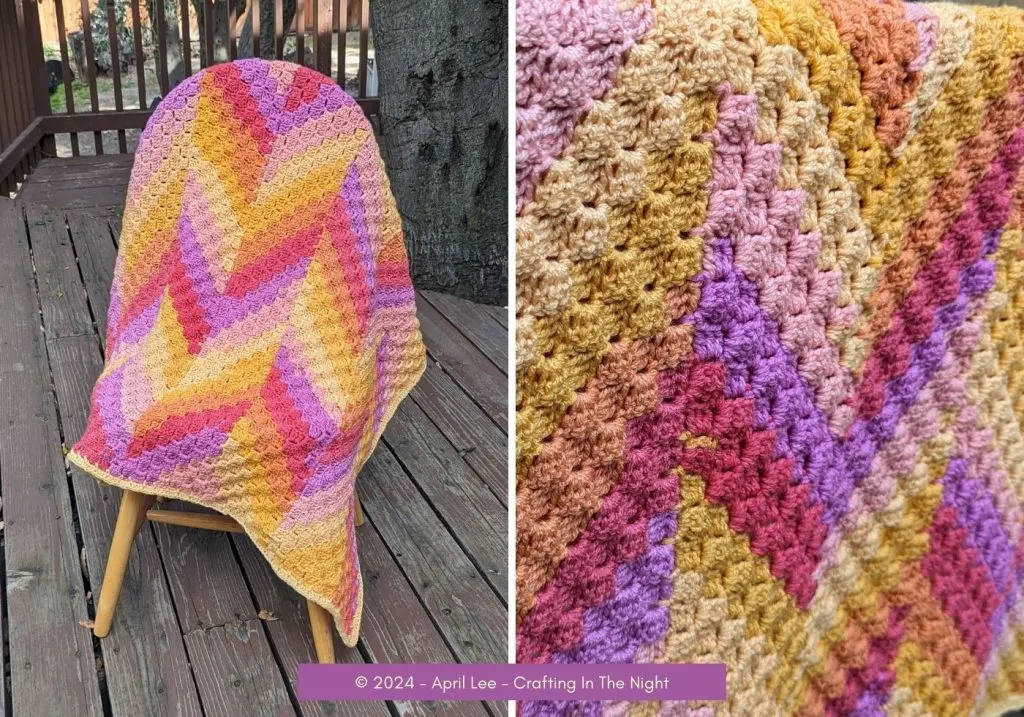
What makes this project truly unique is the way the panels are joined as you go, creating a beautiful chevron effect without the hassle of changing colors or weaving in countless ends. Believe it or not, the entire blanket only has two ends to weave in, excluding the border!
If you’re new to the corner-to-corner technique, this blanket is a fantastic starting point. You’ll get plenty of practice with increases and decreases on each panel, making it an excellent project for beginners, especially those who have done a corner to corner before. Plus, the end result is a stunning, vibrant baby blanket that’s sure to be a cherished gift. Happy crocheting!

Crochet Skills Needed
In order to complete this blanket, you will need to either know or be willing to learn the following crochet concepts:
- Chain
- Slip Stitch
- Double Crochet
- Weaving in Ends

Materials
You can use any weight, color, or brand of yarn to complete this project. You’ll want to be sure to pick the right sized hook for whatever yarn you choose. Here are the supplies I used:
- Caron Cinnamon Swirl Cakes – Mai Tai – 4 cakes
- Red Heart Super Saver – Cornmeal – 30 grams used for Border (optional)
- Size I (5.5mm) Crochet Hook – I love this set on Amazon.com
- Yarn Needle
💡 I only used around 75 grams from the 4th cake of Mai Tai so, if you have just three cakes you could easily do this project and make it just a bit shorter than mine.


Video Tutorial
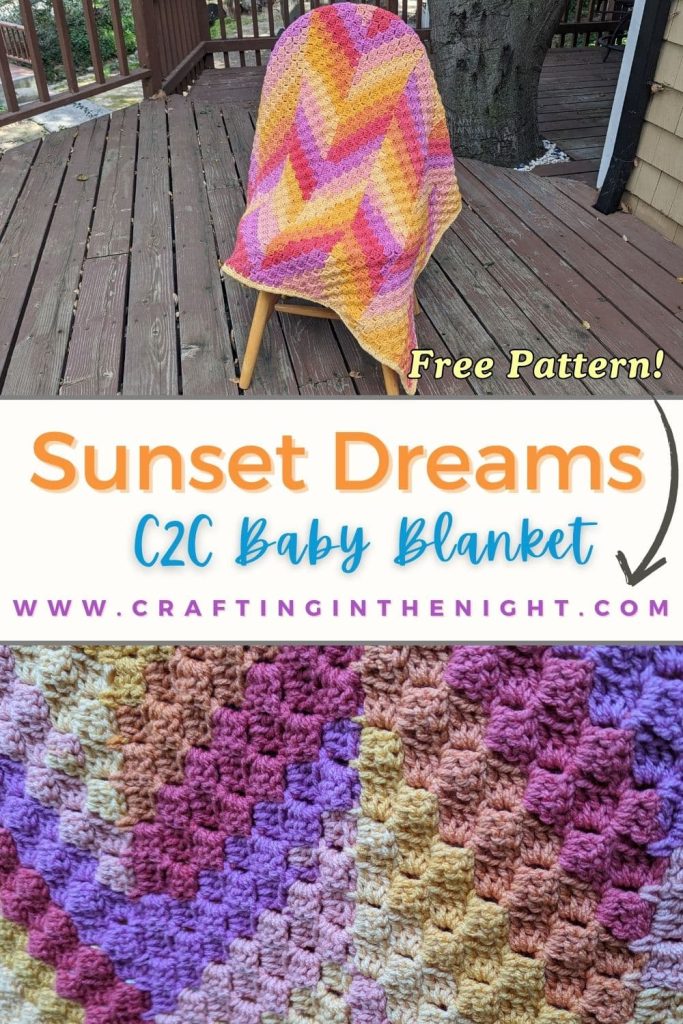
Free Pattern for the Sunset Dreams C2C Baby Blanket
Skill Level: Advanced Beginner
Finished Size: 36″ x 37″
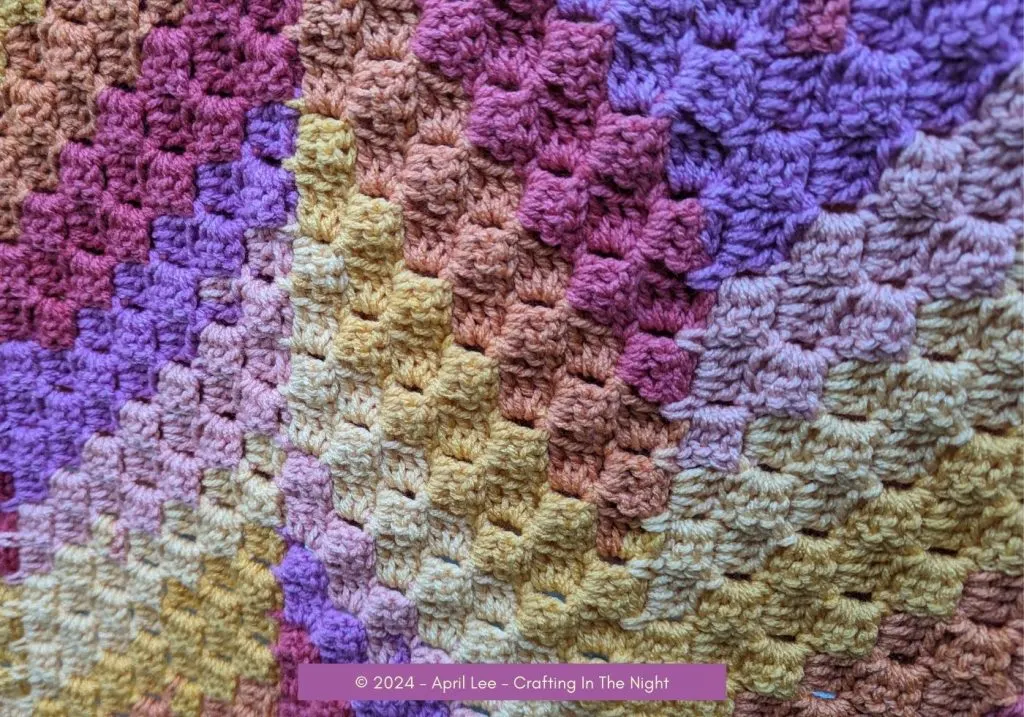
Pattern Overview: If you are familiar with the C2C stitch, for this project you’ll start by creating a panel that is 7 stitches wide and the length you want your project to be. From there, you’ll continue adding sections of C2C, each 7 stitches wide, joining as you go, until your blanket reaches the width you would like it to be.
C2C Increases and Decreases
For corner to corner, for every row, each side is either increasing or decreasing. In this pattern, you’ll do increase rows on both sides until row 7. Starting on row 8, you’ll keep one side straight (decreasing), while continuing to increase on the opposite side, thus creating a rectangle. Finally, after your blanket is the height you would like it to be, you’ll decrease on both sides. Here are the instructions for each:
Increasing: Chain 6. Double crochet in the 4th, 5th, and 6th chains from the hook. Rotate this tile and slip stitch into the space between the chain 3 and the double crochet of the next tile.
Decreasing: At the end of the row, complete your last tile. Instead of increasing, chain 1 and turn. Slip stitch into the top of each of the three double crochets and into the space between the chain 3 and the first double crochet in the last tile. From here you will chain 3 to start your next row.
Panel 1
Row 1: Chain 6. Double crochet in the 4th, 5th, and 6th chains from the hook. This forms the first block or tile.
Row 2: Chain 6. Double crochet in the 4th, 5th, and 6th chains from the hook. Rotate this tile and slip stitch into the space between the chain 3 and the first double crochet of the first tile created. Chain 3 and place three more double crochets into the same space. 2 new tiles formed for Row 2.
Row 3: Chain 6. Double crochet in the 4th, 5th, and 6th chains from the hook. Rotate this tile and slip stitch into the space between the chain 3 and the first double crochet of the first tile created. Chain 3 and place three more double crochets into the same space. Slip stitch into the chain 3 space for the next tile. Chain 3 and place three more double crochets into the same space.
Row 4 – 7: Chain 6. Double crochet in the 4th, 5th, and 6th chains from the hook. Rotate this tile and slip stitch into the space between the chain 3 and the first double crochet of the first tile created. Chain 3 and place three more double crochets into the same space. *Slip stitch into the chain 3 space for the next tile. Chain 3 and place three more double crochets into the same space.* Repeat from * until you reach the end of the row. At the end of the row, complete your last tile. Instead of increasing, chain 1 and turn. Slip stitch into the top of each of the three double crochets and into the space between the chain 3 and the first double crochet in the last tile.
Row 8: Chain 3. Double crochet in the 4th, 5th, and 6th chains from the hook. Rotate this tile and slip stitch into the space between the chain 3 and the first double crochet of the first tile created. Chain 3 and place three more double crochets into the same space. *Slip stitch into the chain 3 space for the next tile. Chain 3 and place three more double crochets into the same space.* Repeat from * until you reach the end of the row.
Row 9 – 44: Continue working pattern as above, increasing on one side only to make a rectangle. 7 total stitches per row.
Row 45-50: Start decreasing on both sides. Finish last block by slip stitching until you reach the corner.
💡 For rows 1 – 7, each row will have the matching number of tiles i.e. 2 tiles in row 2, 4 tiles in row 4, and 7 tiles in row 7. After row 7, the pattern will change so that we always have just 7 tiles and we’ll continue that way until the panel is the height we want it to be.

Second Panel
Row 1: Chain 6, double crochet in the 4th, 5th, and 6th chains from the hook. Rotate block and slip stitch into space between the first two blocks on the side of the first panel.
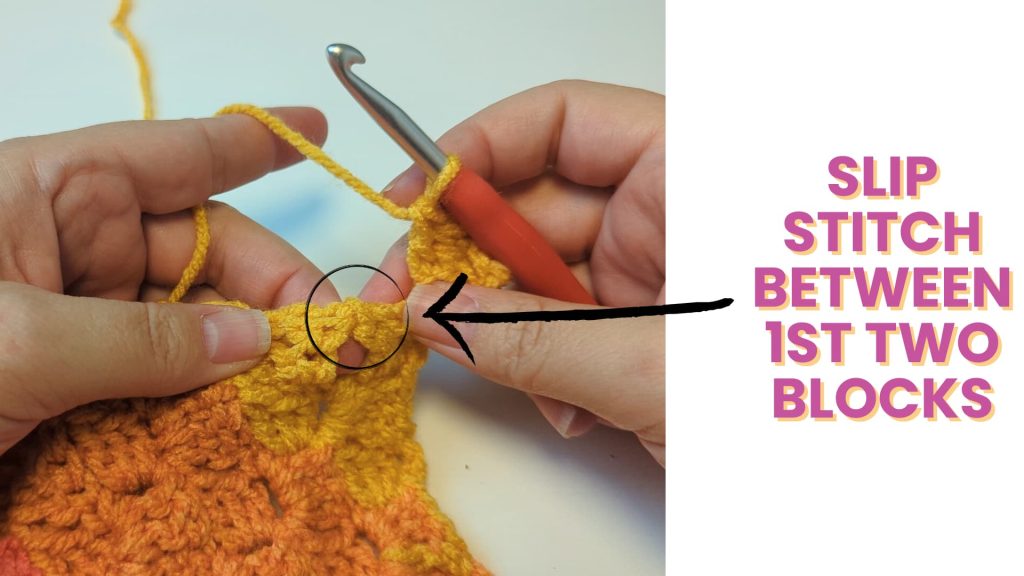

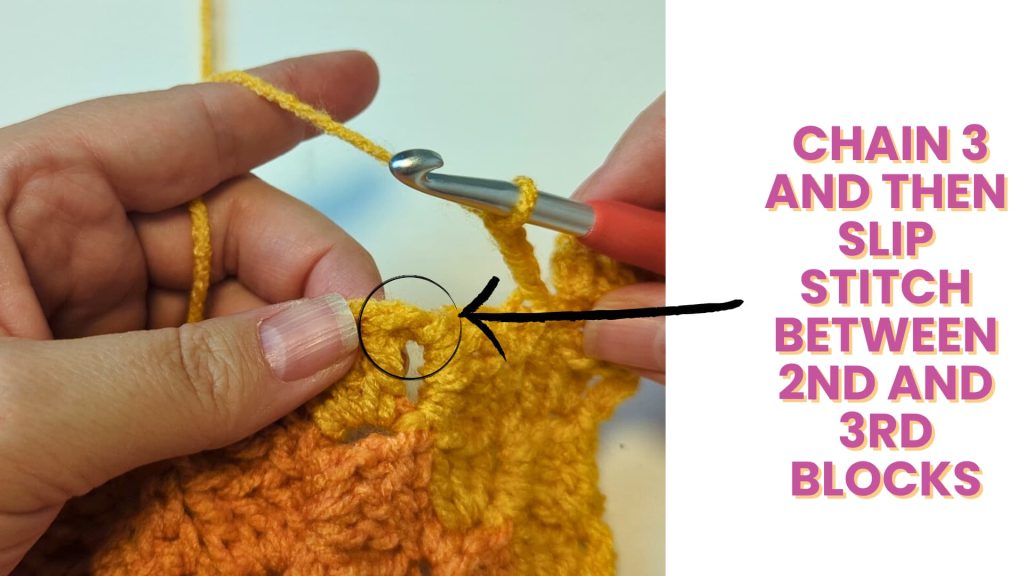
Row 2: Chain 3. Slip stitch into the space between the the second and third blocks on the first panel. Chain 3 and turn your work. Place three double crochets into chain 3 space. Join with a slip stitch into the chain three space of the block from row 1. Chain 3 and place three more double crochets into the same space. 2 new tiles formed for Row 2.


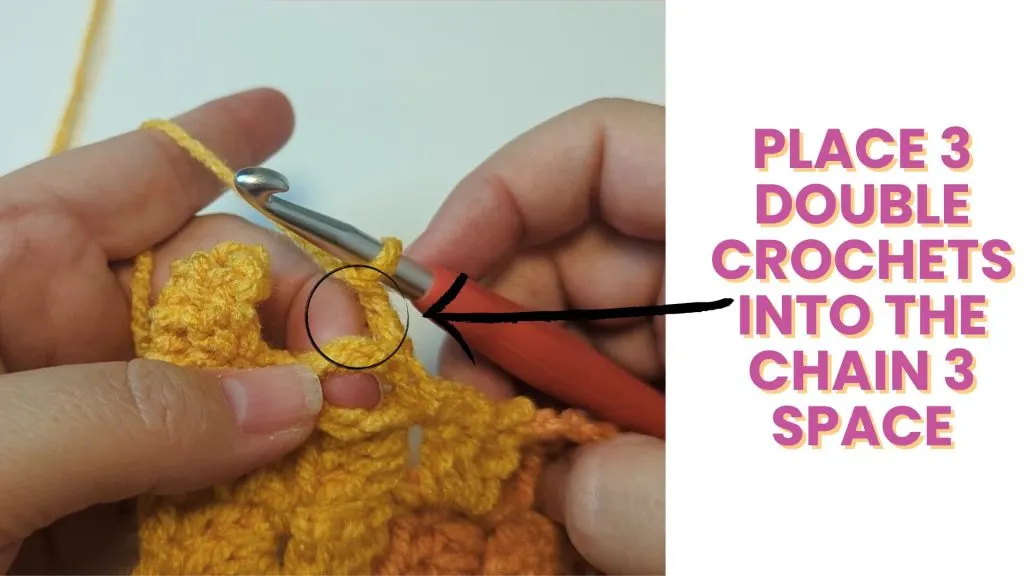
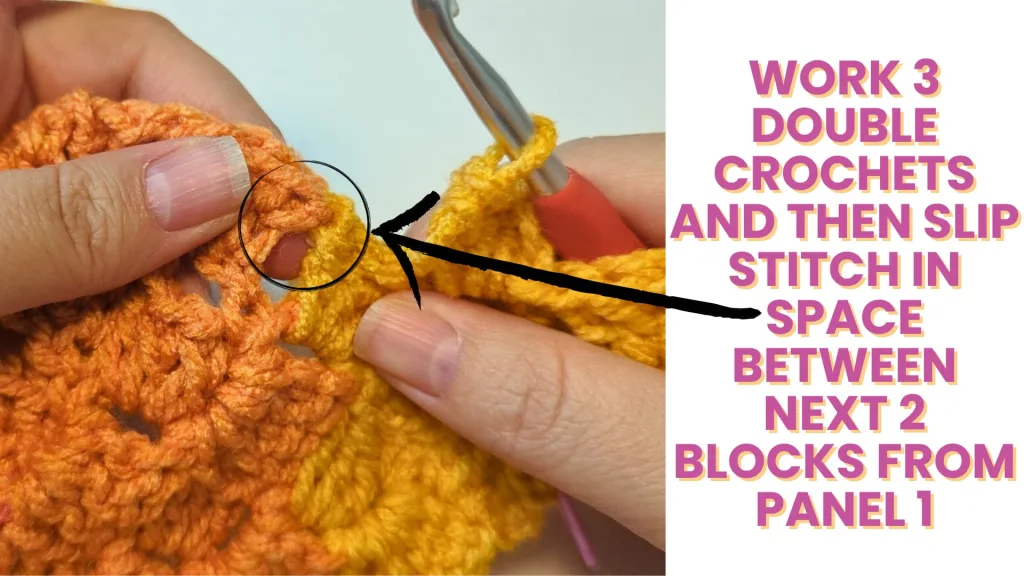
Row 3: Chain 6. Double crochet in the 4th, 5th, and 6th chains from the hook. Rotate this tile and slip stitch into the space between the chain 3 and the first double crochet of the tile from the previous row. Chain 3 and place 3 double crochets into the chain 3 space from the row below. Slip stitch in the chain 3 space of the next block from the previous row. Chain 3 and place 3 double crochets into the chain 3 space from the row below. Join with a slip stitch to the space between the next two blocks on the side of panel.

Continue to repeat rows 2 and 3 until you reach the top of your 1st panel. Depending on how many rows you have, this will connect one of two ways:
Ending Variation 1
For ending variation 1, the last block is worked into the top of the last stitch of panel 1. In this instance, you will join to the top of the last block from the previous panel and work a normal decrease by turning your work, slip stitching across the top of the three double crochets, and slip stitching into the corner panel.
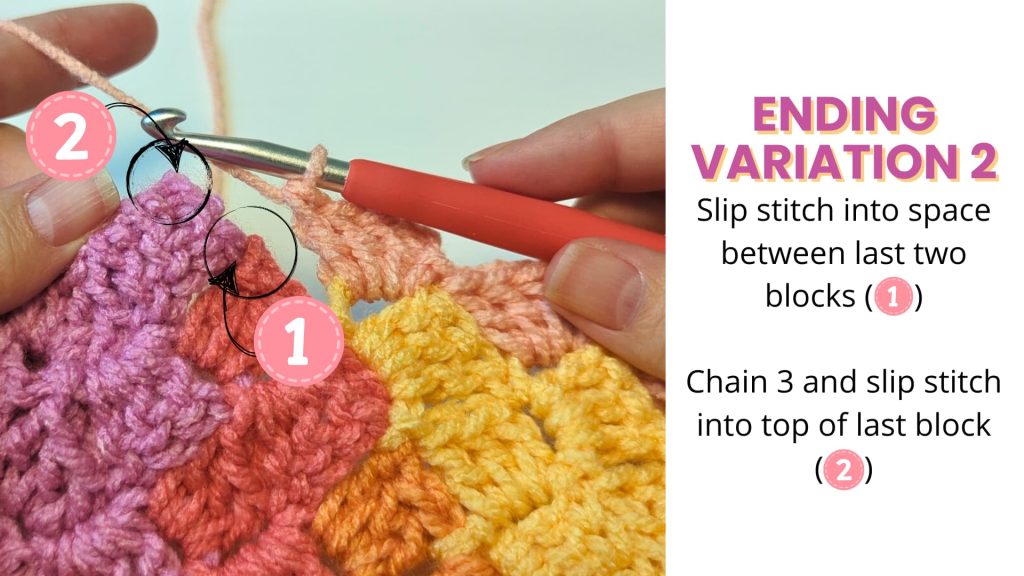
Ending Variation 2
For ending variation 2, the last slip stitch join is into the space between the last and second to last block on the side panel. You will then chain 3 and slip stitch into the top of the last block from the previous panel. Then, chain 3, and place 3 double crochets into the chain three space. Continue on from there as you have previously

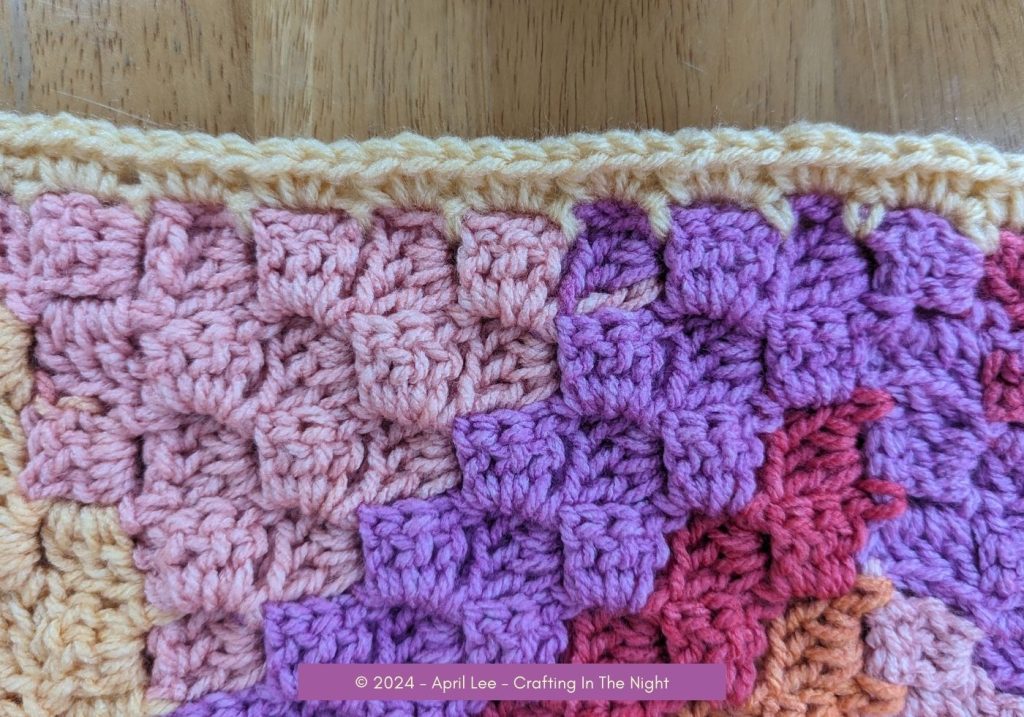
Simple C2C Half Double Crochet Border
One of the great things about a corner 2 corner blanket is that the edges work up nice and straight. That means that you don’t need a border if you don’t want to add one.
Row 1: Join with a standing single crochet in any space between two blocks. Chain 2, single crochet in space between next two blocks. Repeat from * until you reach the corner. Work single crochet, chain 2, single crochet in corner. Continue around and join with slip stitch to starting single crochet.
Row 2: Chain 2, place 2 half double crochets in to chain two space. *Place 3 double crochets in next chain 2 space.* repeat from * until you reach the corner. Work 3 double crochets, chain 2, 3 double crochets in corner. Continue around in same manner and join with slip stitch to top of starting chain 2. Cut yarn and weave in ends.