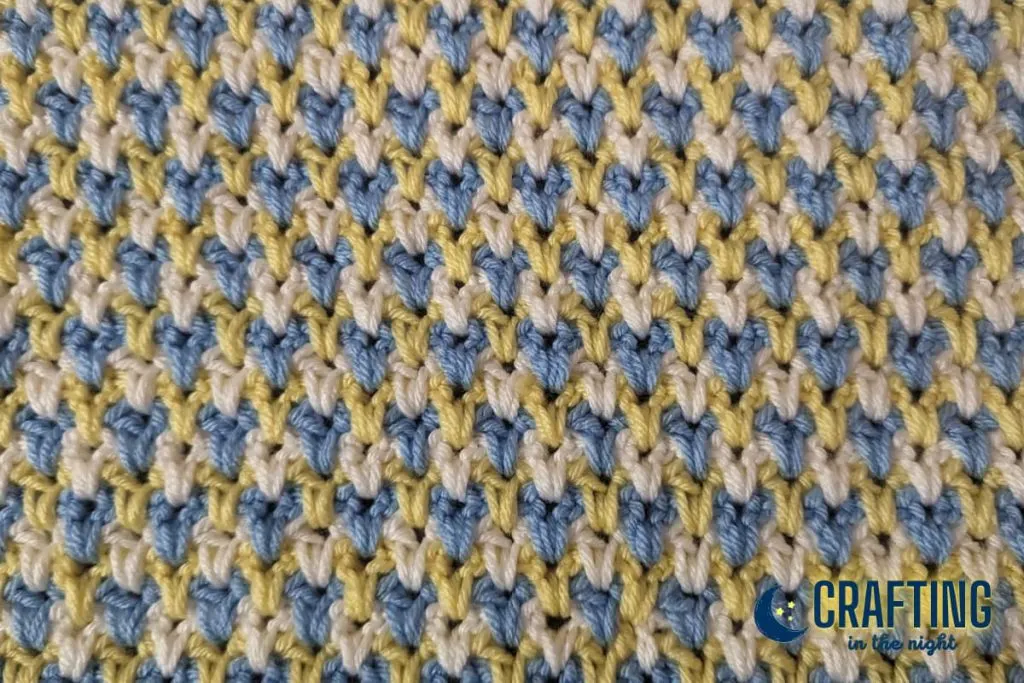
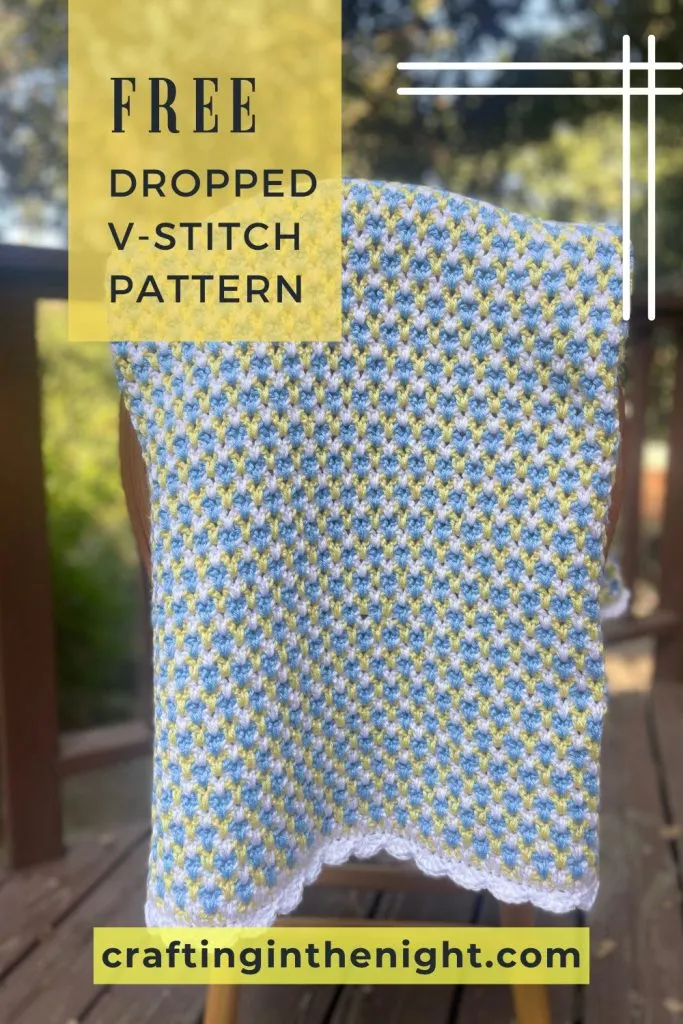
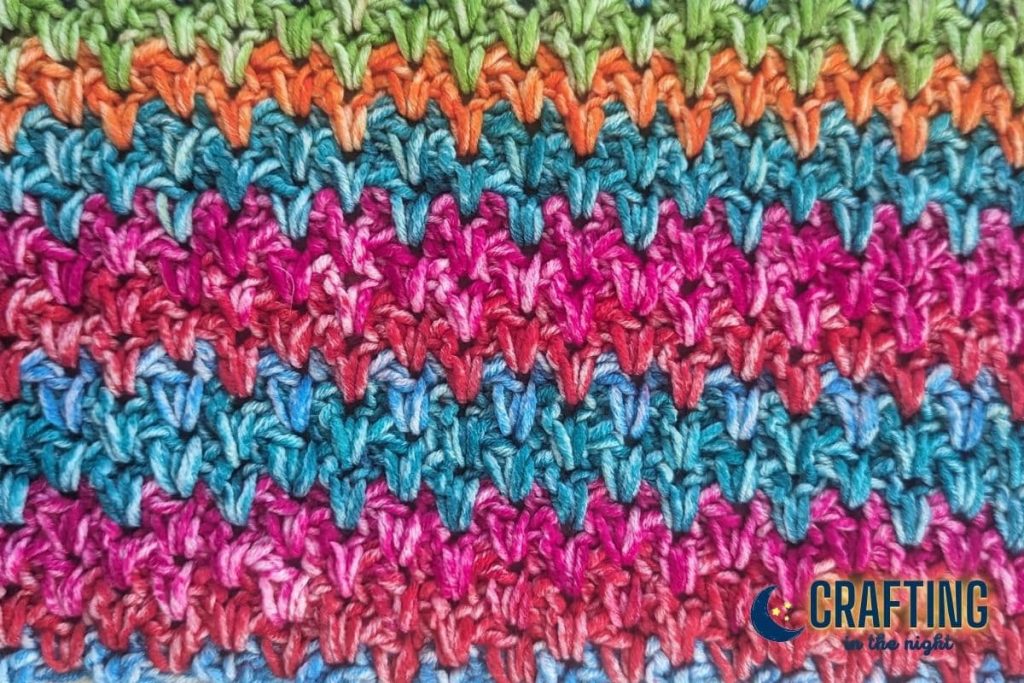
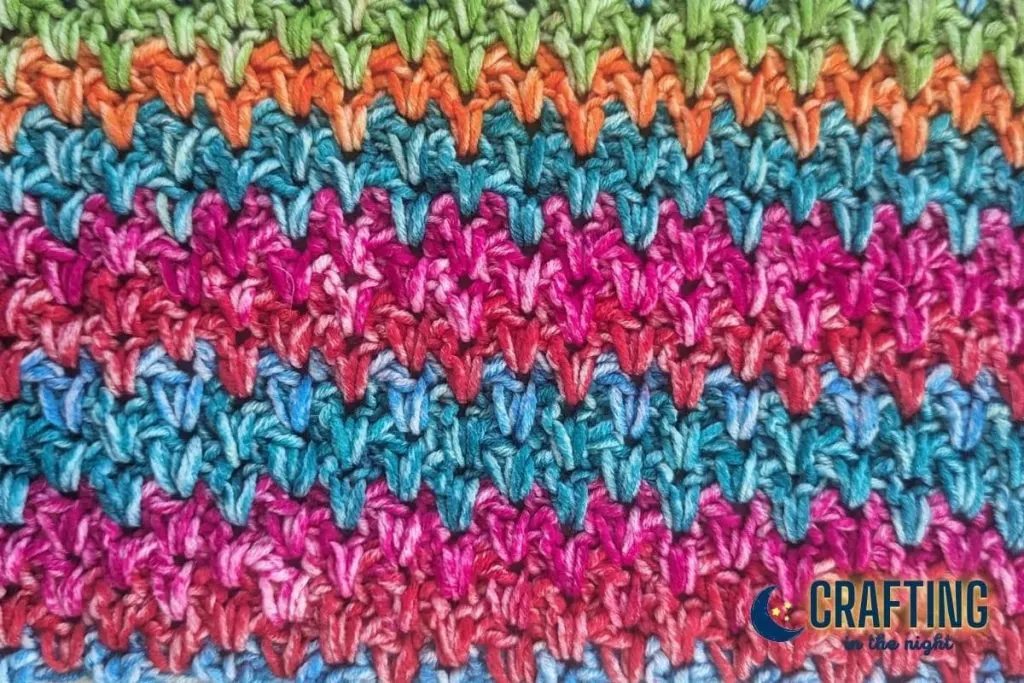
Get ready to step back in time and unlock the magic of a vintage crochet stitch from 1916: the dropped v-stitch. Trust me, it’s going to be a blast! This stitch is not only full of old-school charm but also creates a jaw-dropping pattern when you work it up in three vibrant colors.
Now, here’s the best part: when you use those three colors, the yarn can magically be carried up the sides of the project, leaving you with only a few ends to weave in. How awesome is that? Plus, the result is an absolutely stunning pattern that will make you feel like a crochet wizard.

But wait, there’s more! If you’re feeling daring, why not try a self-striping yarn? It’ll give you a similar effect with those colors blending and shifting effortlessly, like a work of art. Or if you’re more into the classic vibes, this pattern can also be worked up in a solid color.
Now, I have a confession to make: this pattern is a bit of a “yarn eater.” Yep, it loves to gobble up yarn and create a dense finished object. But hey, that’s not necessarily a bad thing! It could actually make for an incredibly cozy weighted blanket.
If you’re making something for a sweet little newborn or prefer a lighter project, opt for a #3 weight yarn, and you’ll still end up with a breathtaking result that’s just as beautiful.
Once you conquer the first two rows, which might require a bit of patience, the rest of the pattern is a breeze. It’s a simple two-row repeat that’ll have you hooked in no time. And here’s a secret: since we work into the spaces, it’s the perfect project for those relaxing moments when you’re crocheting in low light, like snuggled up on the couch watching your favorite TV show.

Even though the first two rows might give you a little challenge, this pattern is totally doable for advanced beginners. I’ll be right here with you, guiding you every step of the way. You’ll feel like a crochet pro before you know it!
So grab your hooks, gather your colors of choice, and let’s dive into the wonderful world of the dropped v-stitch. Whether you’re making a cozy weighted masterpiece or a lighter blanket for a precious little one, this pattern is going to blow your mind with its beauty. Get ready to crochet your way to pure crochet magic!
Materials and Tools
This pattern can be worked with any weight of yarn and the corresponding hook. I recommend you start with a 3 or 4 weight yarn. I’m using a #4 worsted weight yarn and size I (5.5mm) crochet hook.
If you are making a baby blanket, I do recommend using a #2 or #3 weight yarn for this project as the #4 weight yarn turns out quite heavy. Of course, this also makes it a great option for a weighted crochet blanket for older children or adults.
To get the exact colors in the blanket pictured in this post, you’ll want to pickup the following colors:
|
|
|
|
$11.60
|
$3.59
|
$11.86
|
For this swatch, I’ll be using 3 colors however, this pattern looks great in self-striping yarns and can be worked up in a single color as well if you would like.
- Size I (5.5mm) Crochet Hook (I use this set)
- Yarn Needle (to weave in ends)
- Scissors
Pattern Notes
- Yarn Eater – This pattern is absolutely a yarn eater. While it creates a beautiful pattern (especially if three colors are used), it uses a lot of yarn compared to other projects of the same size.
- Works Up Slowly – This pattern works up pretty slowly compared to most stitch patterns due to the way we drop down for each row. I would say it works up only slightly faster than a single crochet blanket.
- Dense & Heavy – This could be both a pro and a con. If you are wanting to make a weighted crochet blanket, this stitch might be perfect. If you are looking for a lightweight and flowy blanket, this isn’t the stitch for you.
Stitches Used
Chain (ch)
- Yarn over (yo)
- Pull through loop
Single Crochet (sc)
- Insert hook under both top loops of the stitch you are working into.
- Yarn over (yo)
- Pull through the stitch (there should now be two loops on your hook)
- Yarn over (yo)
- Pull through both loops on your hook.
V-Stitch
- Double crochet
- Chain 1
- Double crochet in the same stitch
Stitch Diagram
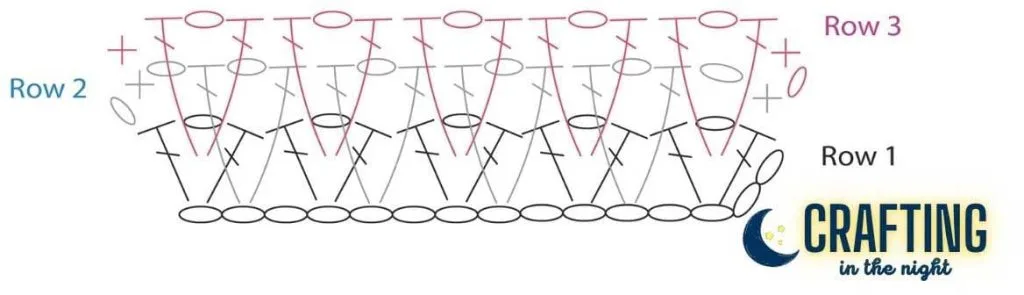
The dropped V-Stitch was kind of hard for me to illustrate so, instead of a typical diagram that shows all rows at once, I’ve broken it down into 3 diagrams so that you can see where the stitches are placed for each row.
Row 1 & 2
For row 1, you’ll make a chain in multiples of 3 until the chain is the width you would like your project to be. Then, you’ll work your first v-stitch into the third chain from the hook, skip 2 chains, and work your second v-stitch. Row one repeats this v-stitch, skip 2 sequence across the length of the chain. You’ll end with a v-stitch in the last chain.


Row 2 is where things can get a little tricky if you are new to crochet. You’ll chain 1 and turn. Place a single crochet in the last double crochet from the row below. Chain 1 and work a v-stitch just to the left of the v-stitch in the row below. You’ll continue to work your v-stitches into that same spot as you go across your work. When you reach the end of the row, chain 1 and single crochet into the top of the chain 2.
If you need a visual reference, scroll down to the detailed photo guides at the bottom of this post for where you should place your v-stitches for row 2.
💡 TIP: Really, you could use either of the two chains from the foundation row for row 2. I use the one closest to the hook as I crochet across so the stitch doesn’t have to stretch as far, which only matters for that first v-stitch.
Row 3
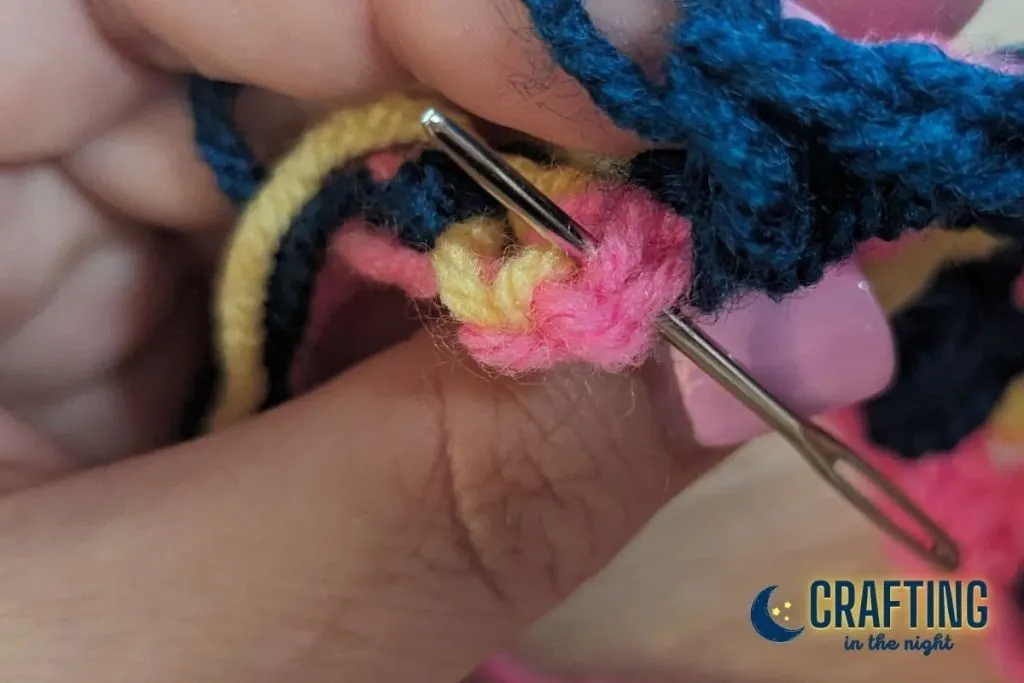
Row 3 is the first of our two repeat rows. For this row, you’ll work your v-stitches in the chain 1 spaces two rows below. You can see in the illustration below I’ve greyed out row 2. You want to skip that row that is just beneath your current row and then work into the chain 1 spaces the second row below your current one.

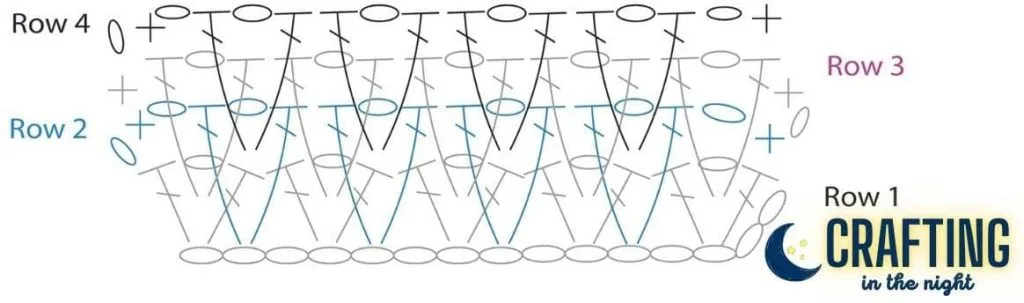
Row 4
Row 4 is similar to row 3 except that we need to add one chain after our starting single crochet. This chain helps us bridge the gap to make our first v-stitch 2 rows below. Likewise, row 4 has a chain 1 between the last v-stitch and the ending single crochet, again to help bridge that gap.

Free Dropped V-Stitch Pattern
This stitch has a repeat of 3. That means you’ll work your starting chain in sets of 3 until it the chain is roughly the width you would like your blanket to be. For this tutorial, we’re going to create a block that is approximately 7″ wide by 7″ high for my stitch sampler blanket.
- Skill Level: Advanced Beginner
- # Ends to Weave In: 6 (if you use three colors of yarn)
Pattern written using US terms.
Starting Chain: Start with a chain of 24 (or any multiple of 3)
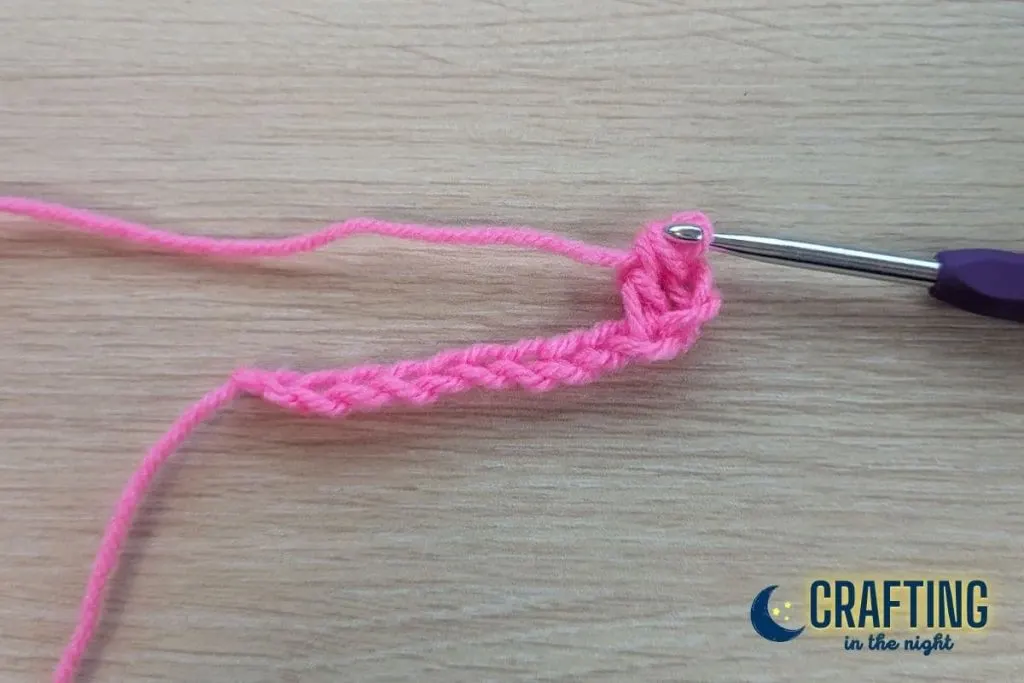
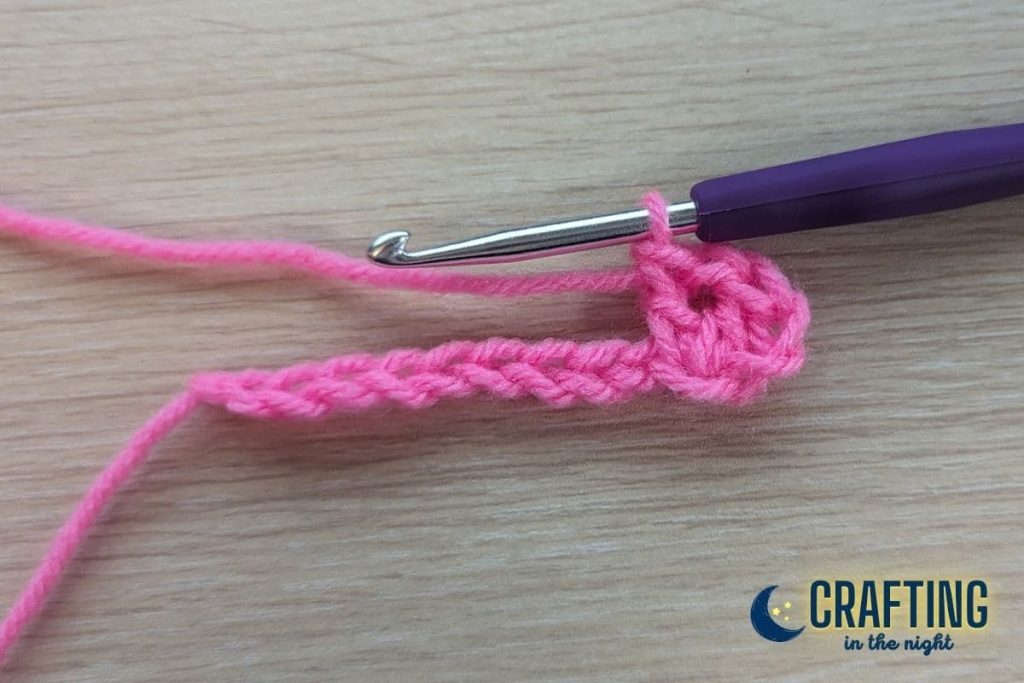
Row 1: Double crochet in the 3rd chain from your hook. Chain 1, Double crochet in the same stitch. This forms your first V-stitch. *Skip 2 chains, and work a V-Stitch in the next.* Repeat from * until the end of your starting chain.
💡 Tip: You should end with a V-Stitch in the very last chain. If your count is off by one, you can fudge it a bit here by skipping one more or one less than normal.
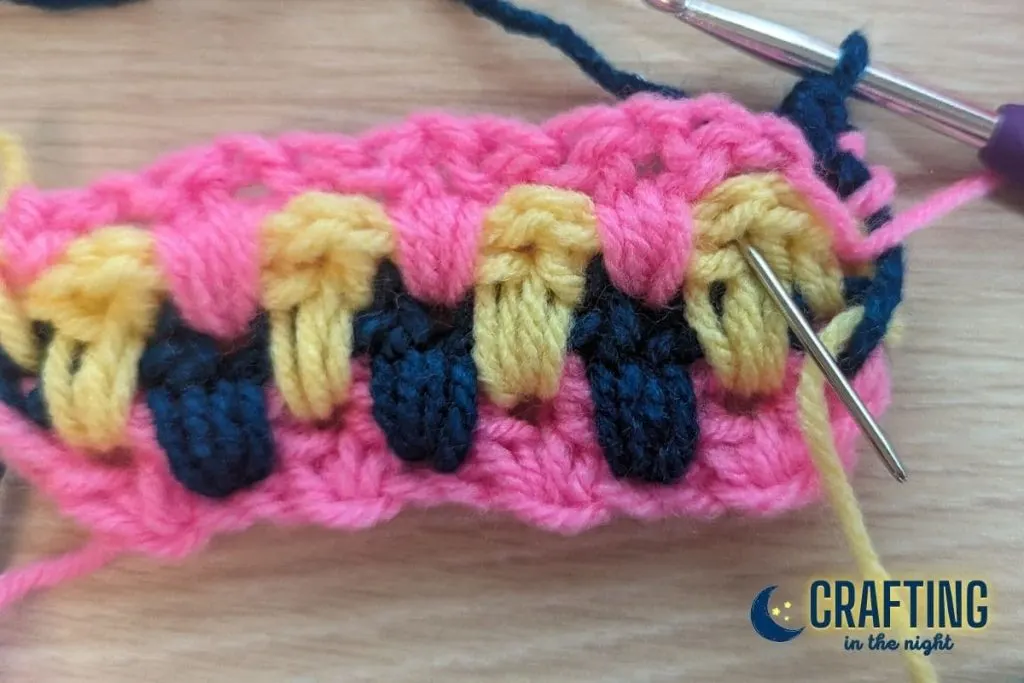
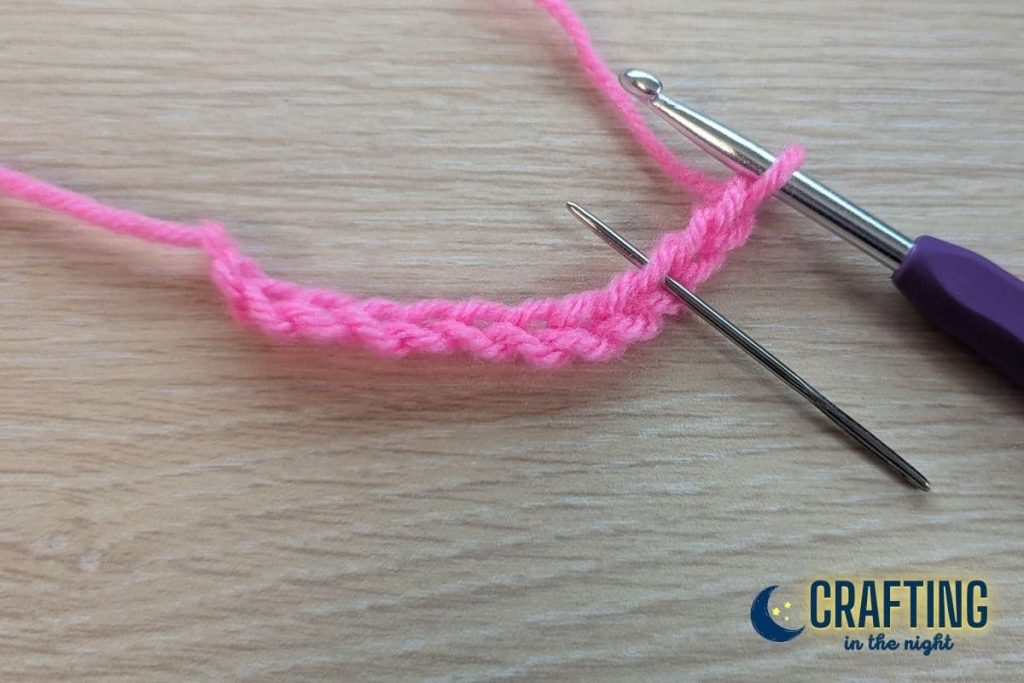
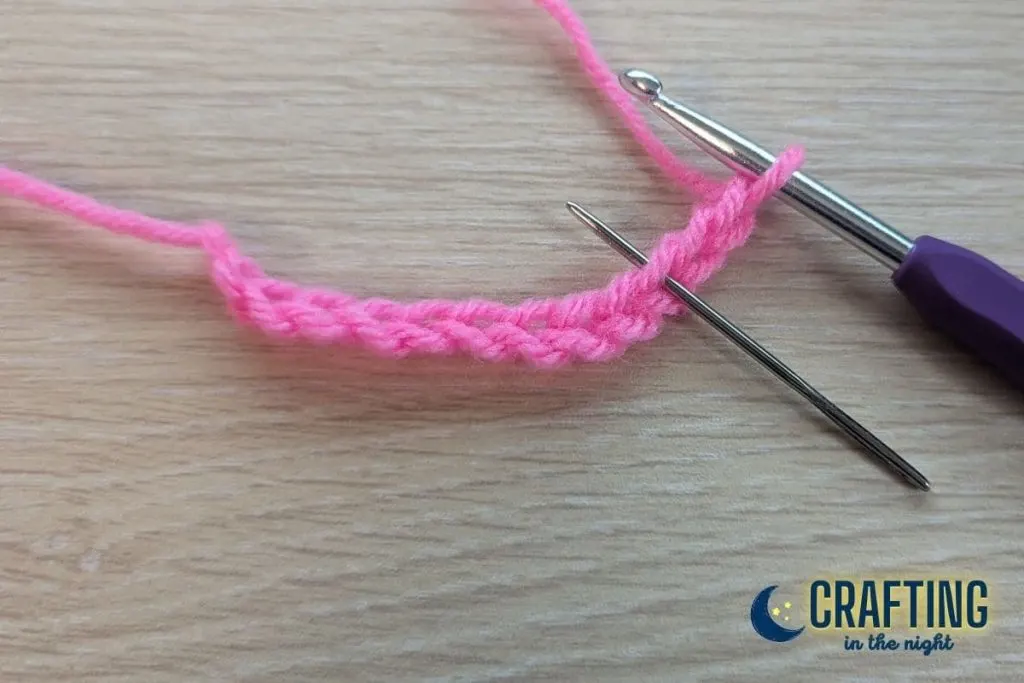
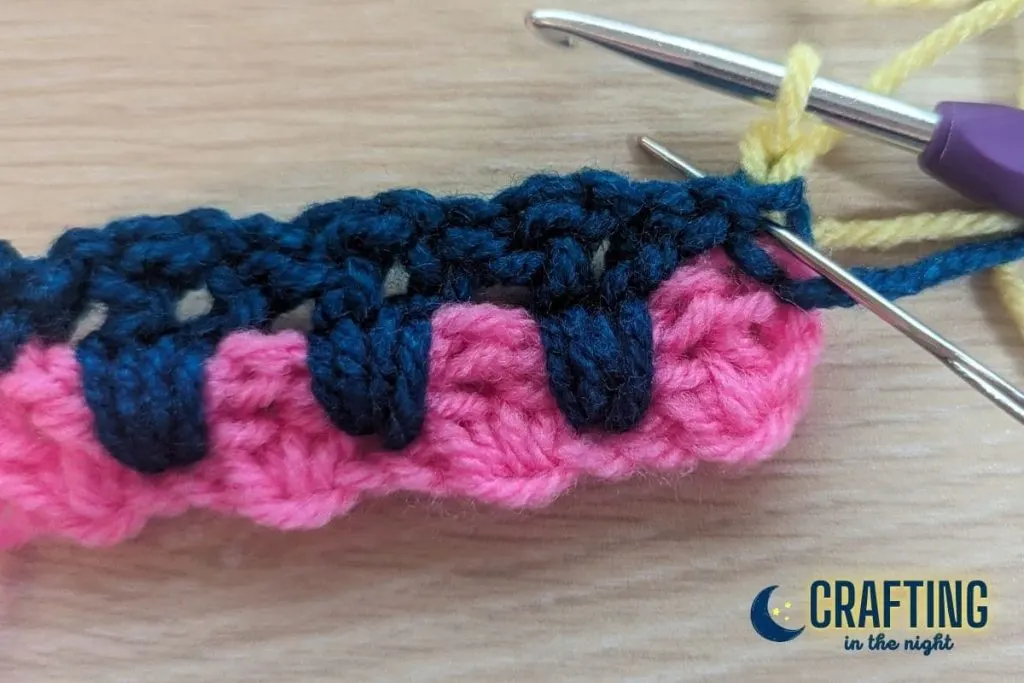
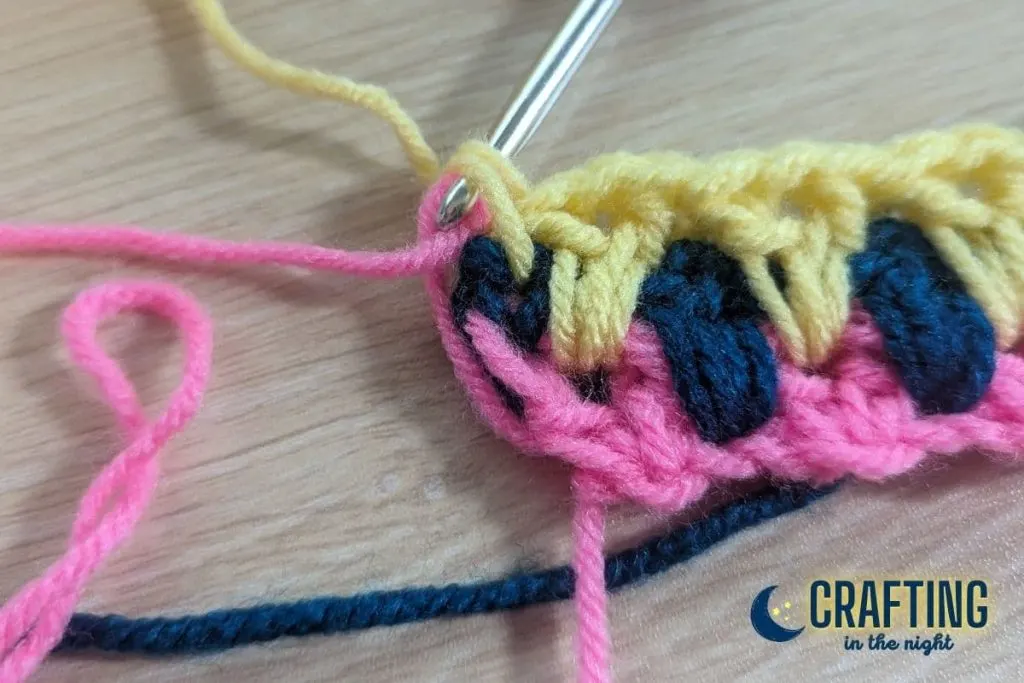
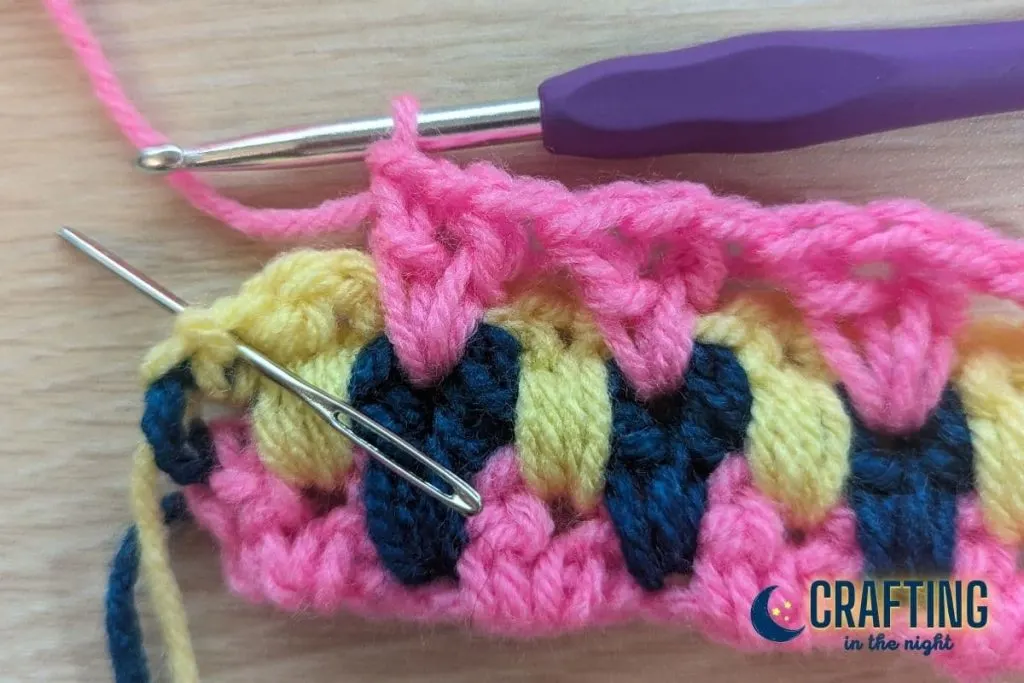
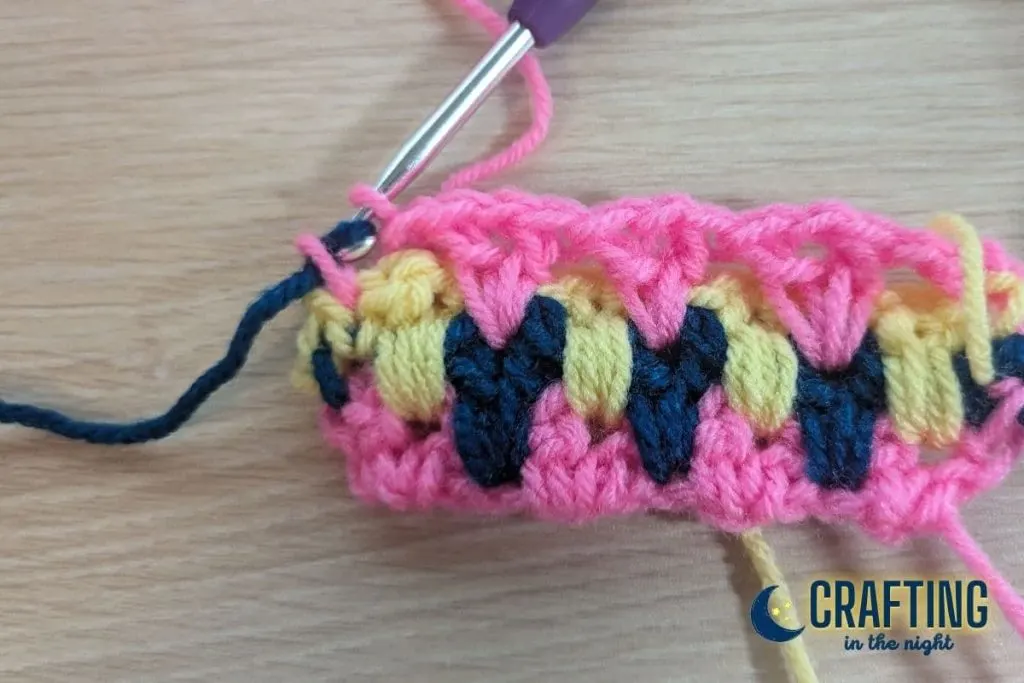
Row 2: Chain 1 and turn. Work a single crochet into the top of the last double crochet from the row below. Chain 1. Work a V-Stitch into the starting chain that is just to the left of the v-stitch from the previous row. Continue working V-Stitches into the starting chain, just to the left of each v-stitch from the previous row. When you reach the end of the row, chain 1, single crochet into the top of the chain 2 in the row below.
💡 Tip: If you have trouble getting into the top of the chain 2, you can single crochet into the space between the chain 2 and the first double crochet instead.
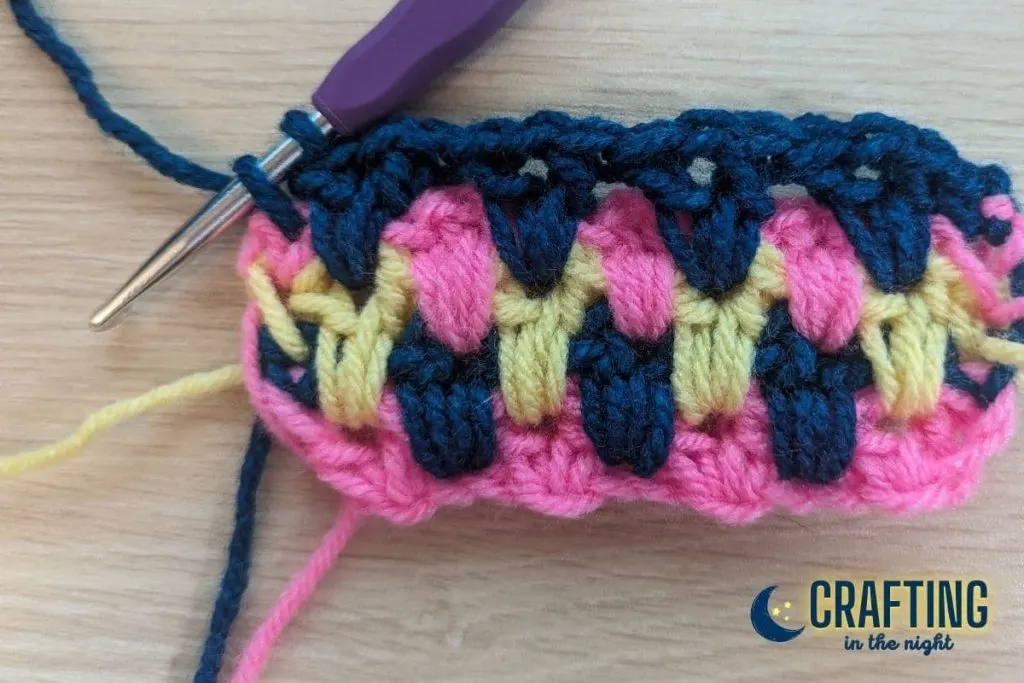
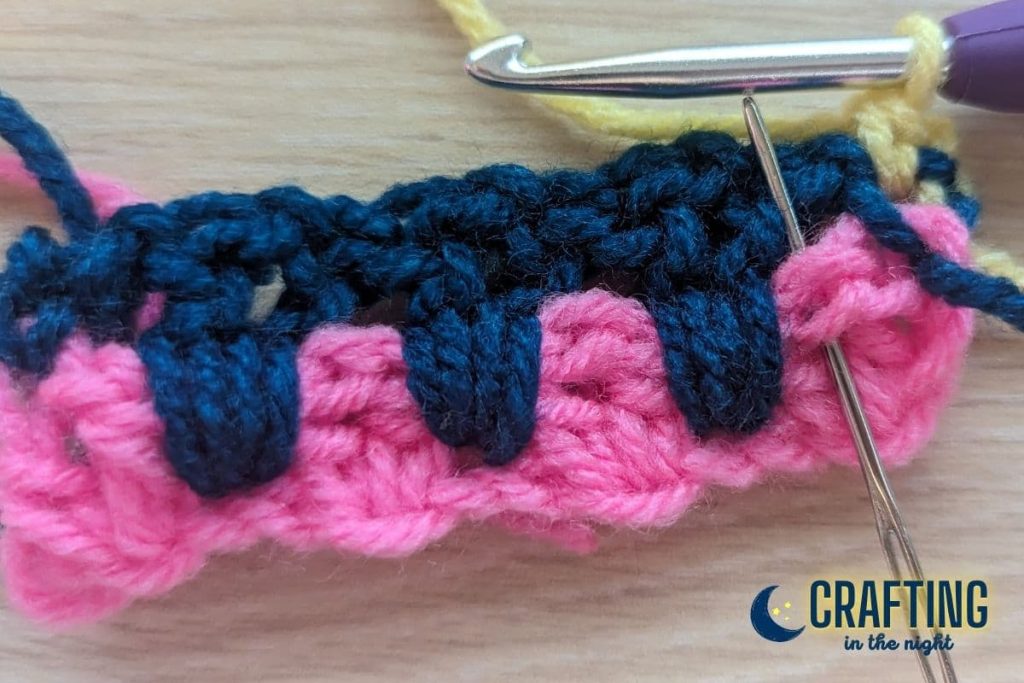
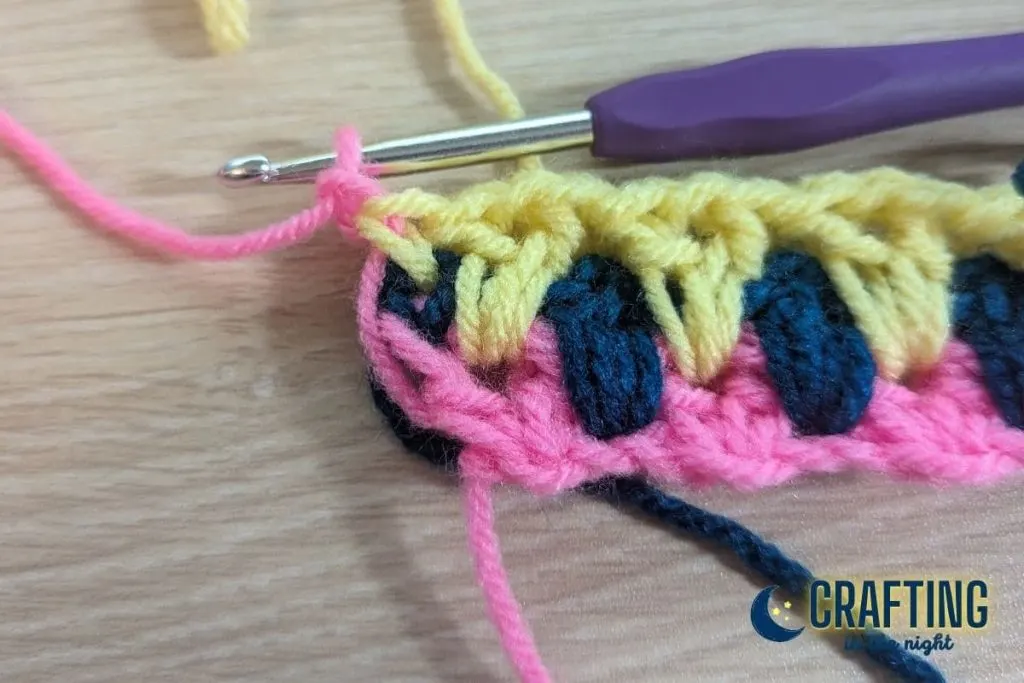
Row 3: Chain 1 and turn. Work a single crochet into the top of the single crochet from the row below. Work a V-Stitch into the chain 1 space of the V-Stitch in row 1. Continue working a v-stitch into each chain 1 space in row 1 until you reach the end of the row. Single crochet into the top of the single crochet from row 2.
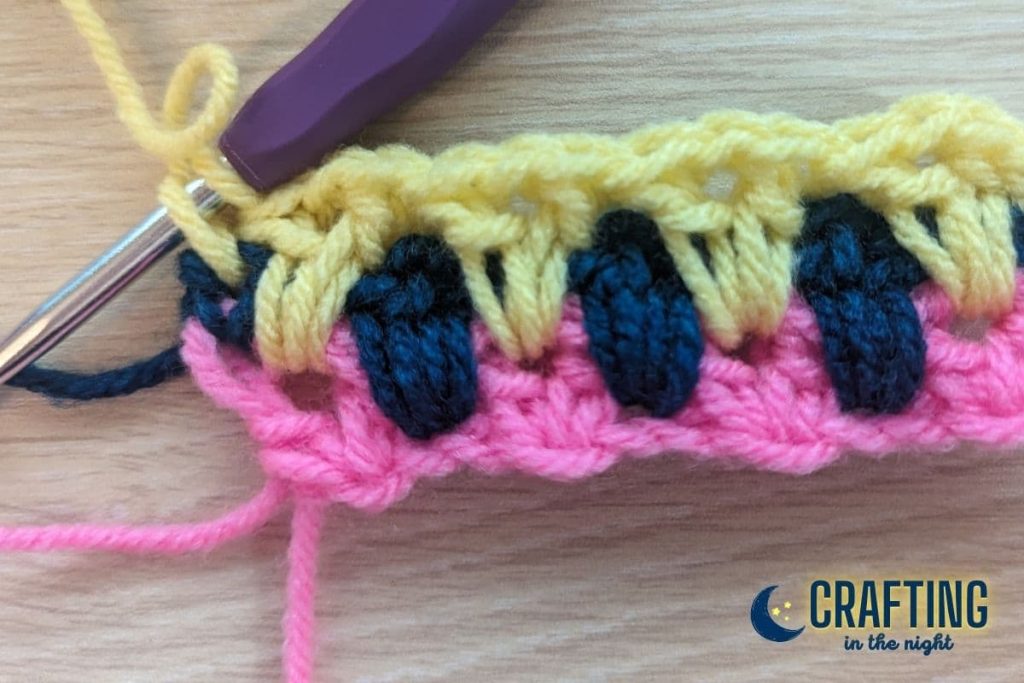
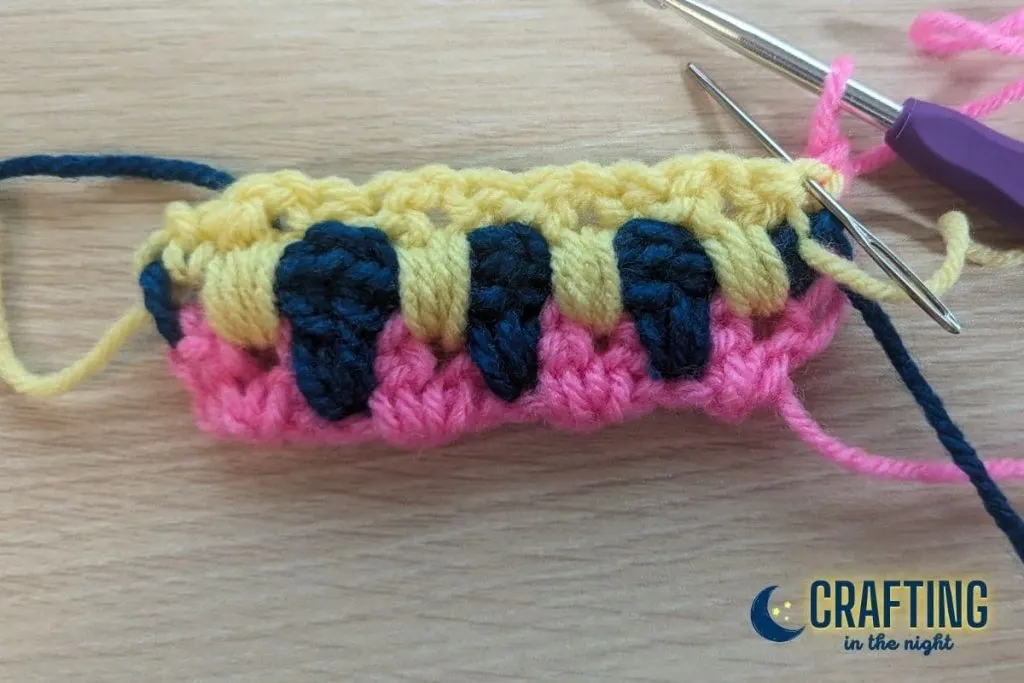
Row 4: Chain 1 and turn. Work a single crochet into the top of the single crochet from the row below. Chain 1. Work a V-Stitch into the chain 1 space of the V-Stitch in row 2. Continue working a v-stitch into each chain 1 space in row 2 until you reach the end of the row. Chain 1 and single crochet into the top of the single crochet from row 3.
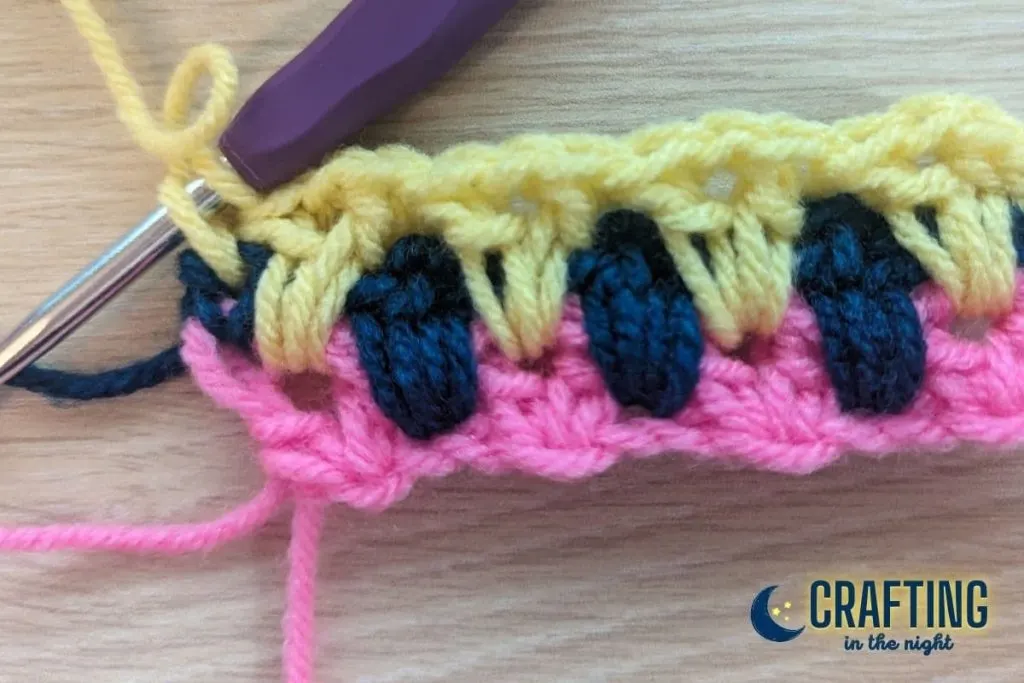
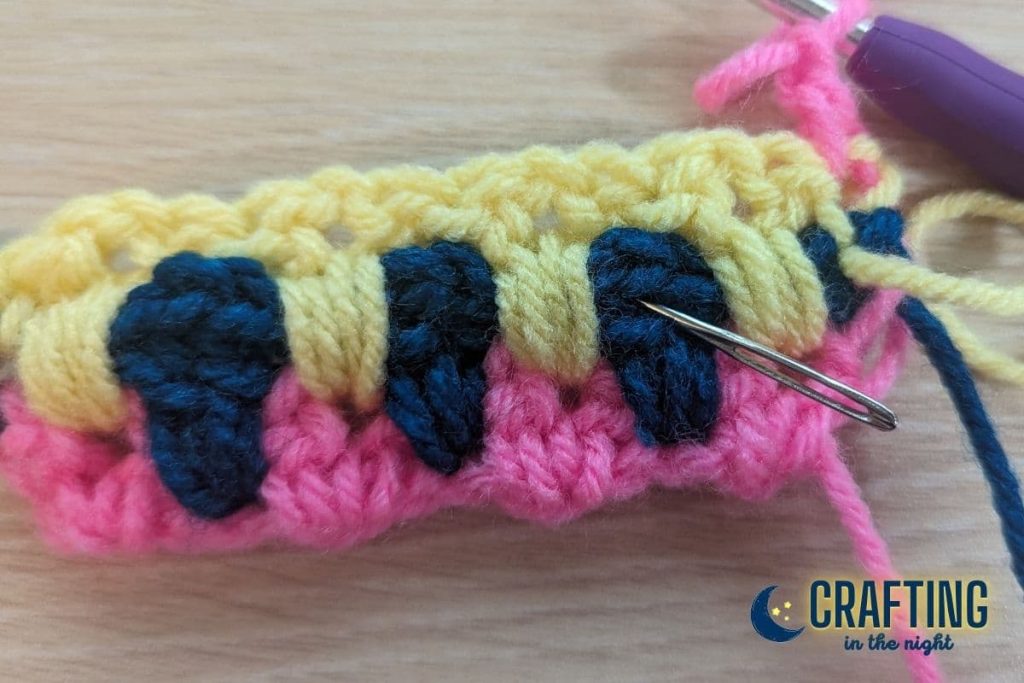
Repeat: Rows 3 & 4 are your repeat row. You’ll continue to work your v-stitches until your project reaches the size that you want it to be.
Final Row: To work the final row, I like to adjust the height just a little bit by working my v-stitches with half double crochets instead of double crochets. You can end on a repeat of either row 3 or row 4, but I found that shortening the stitch height by using half-double crochets for the v-stitches gives me a nicer edge when I add my border.


Video Tutorial
Step-by-Step with Photos
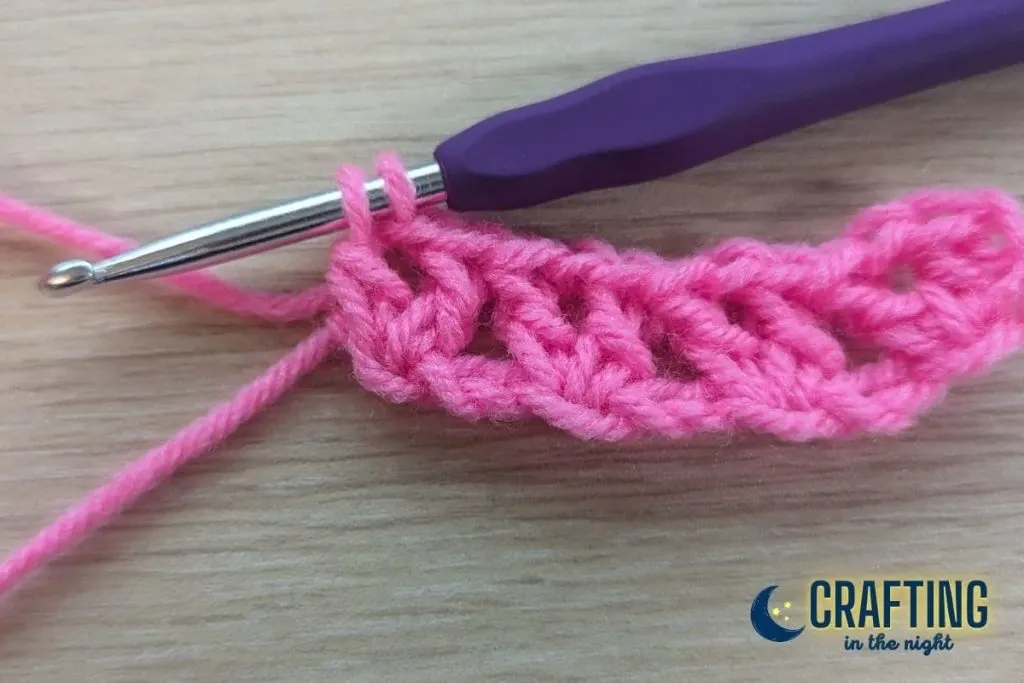
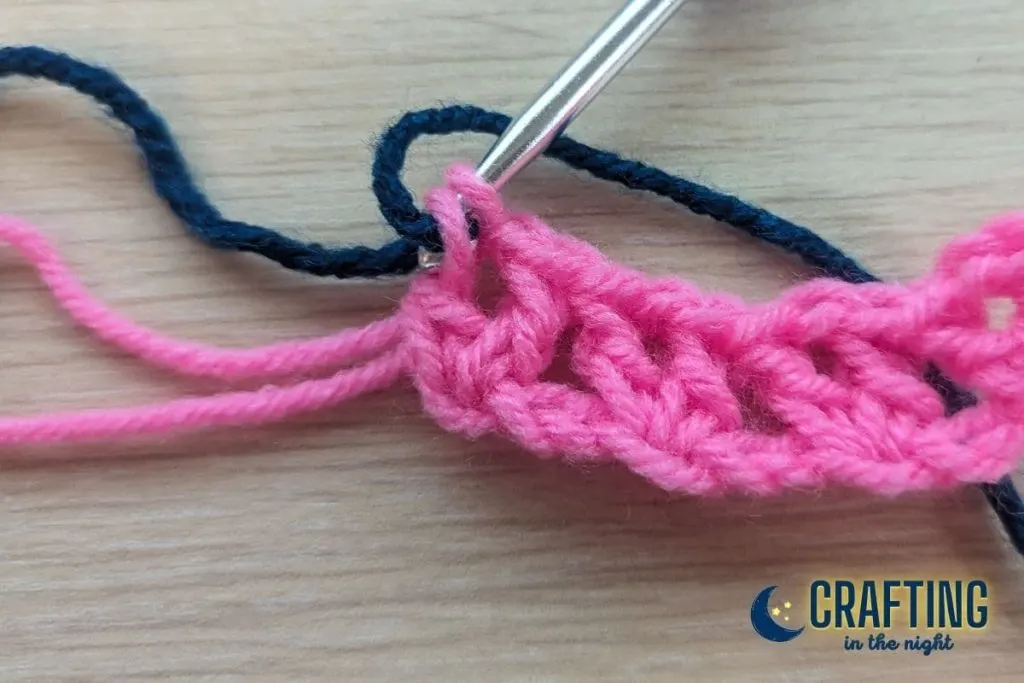
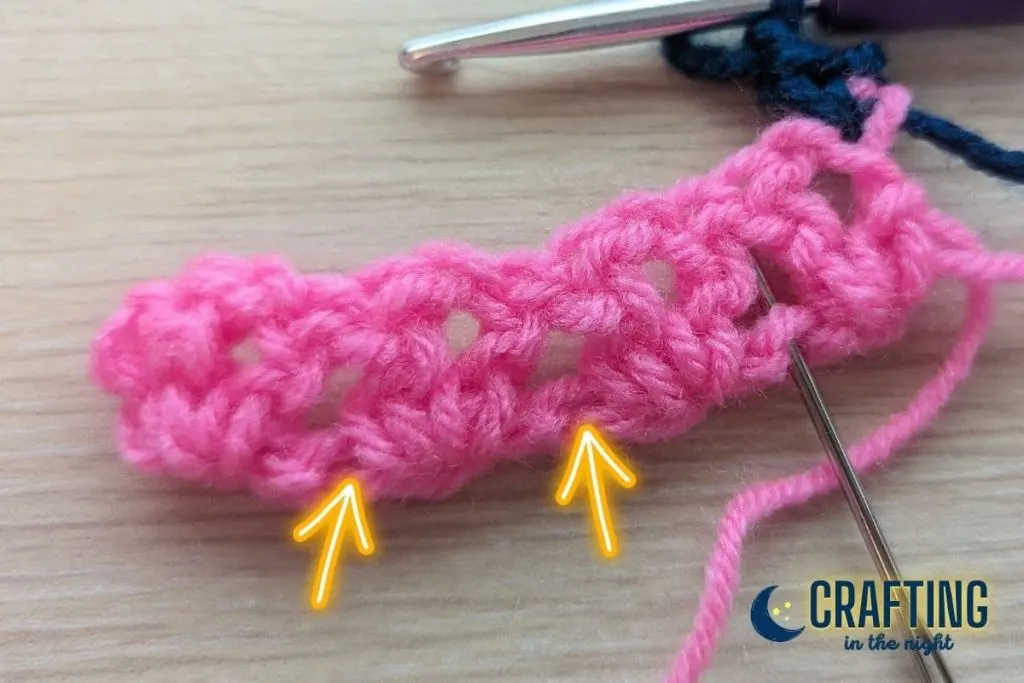
Row 1


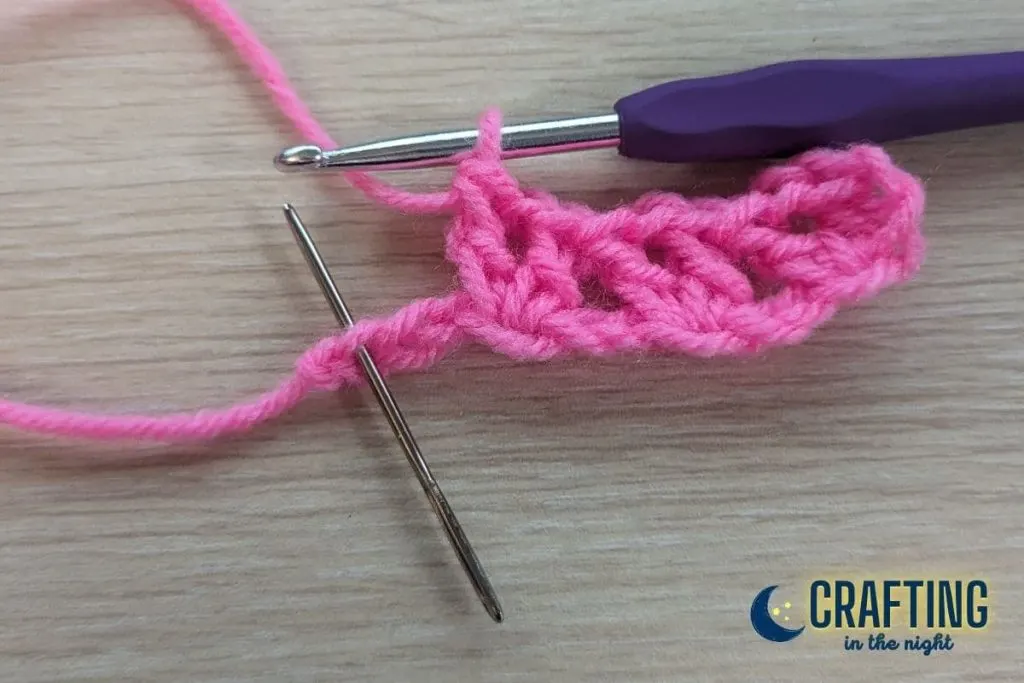


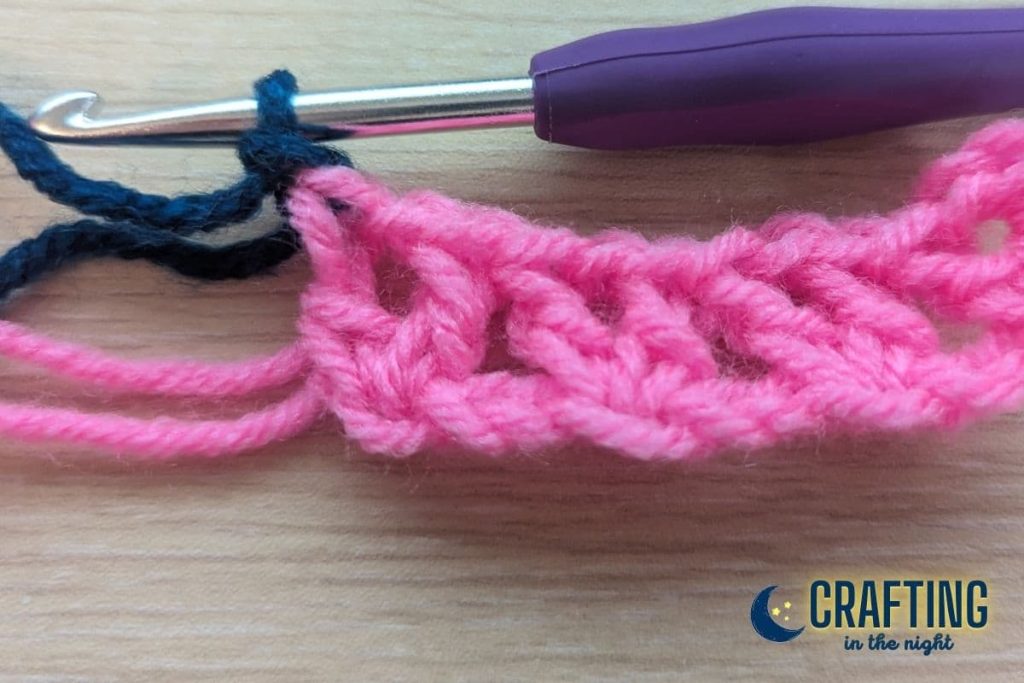
Row 2

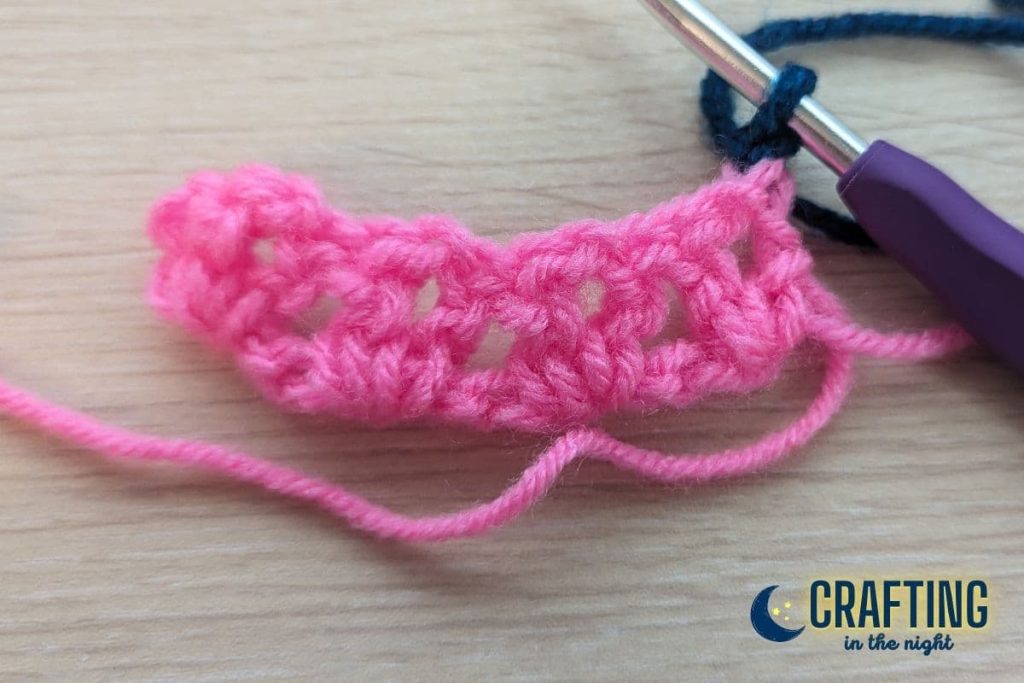


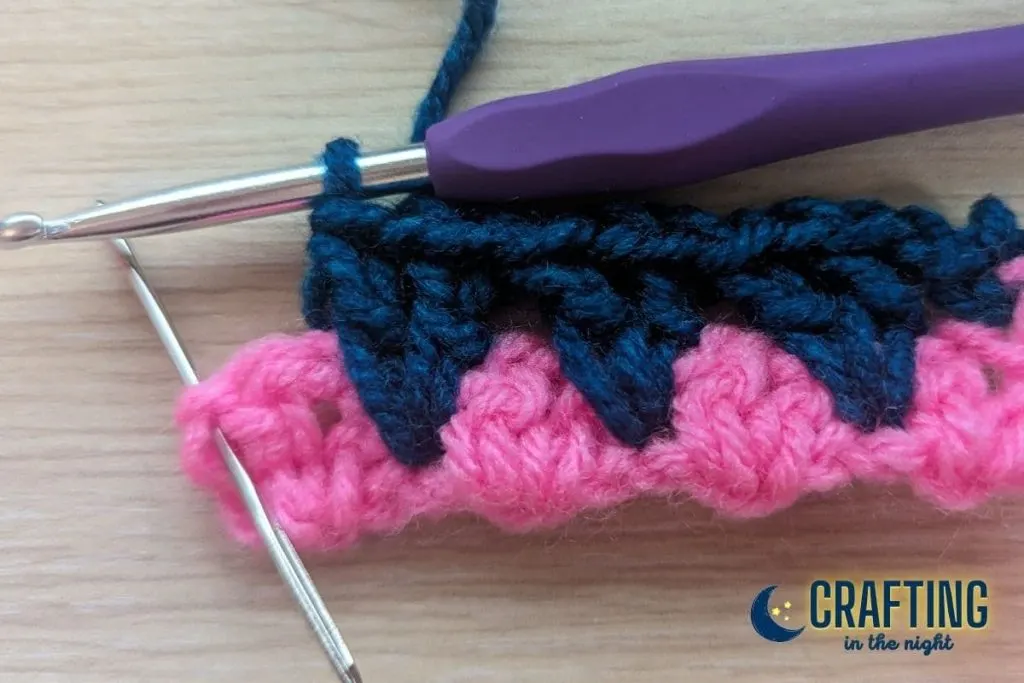
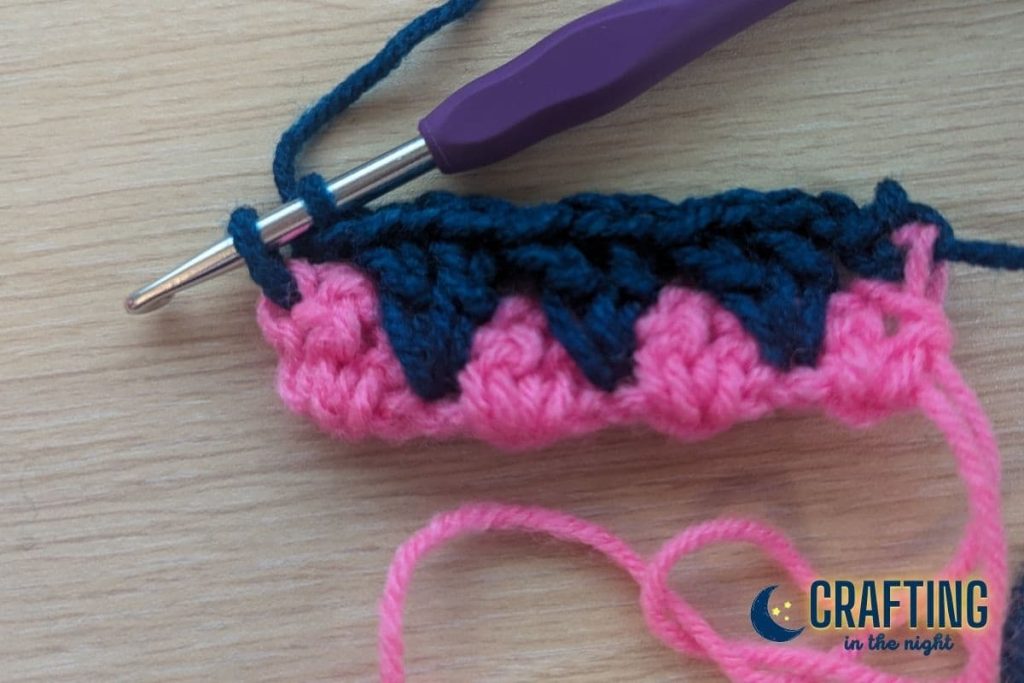


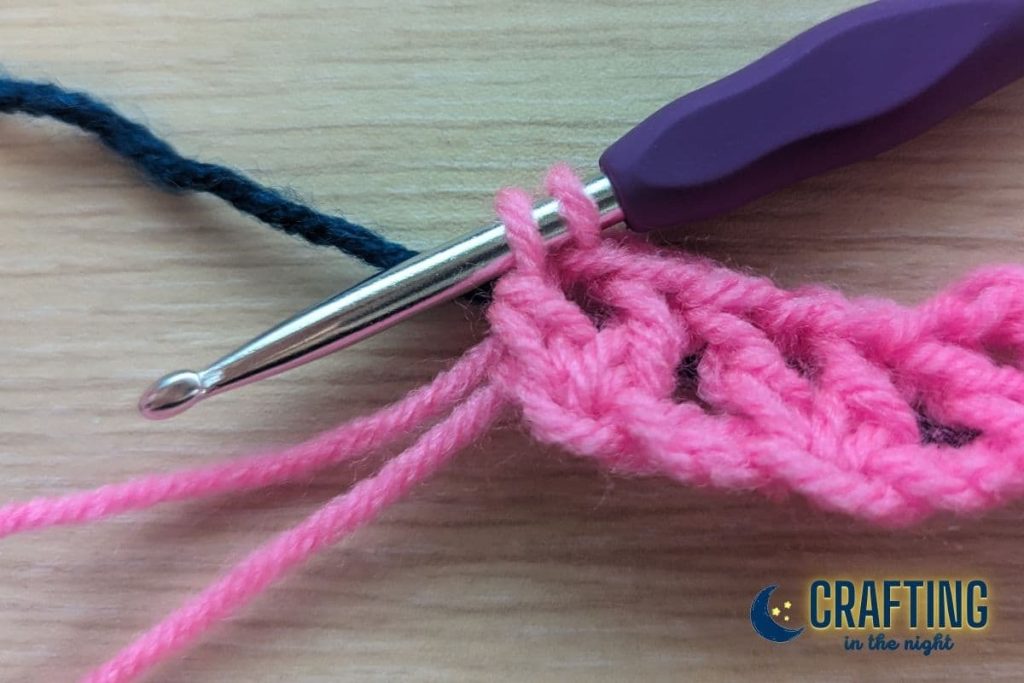
Row 3


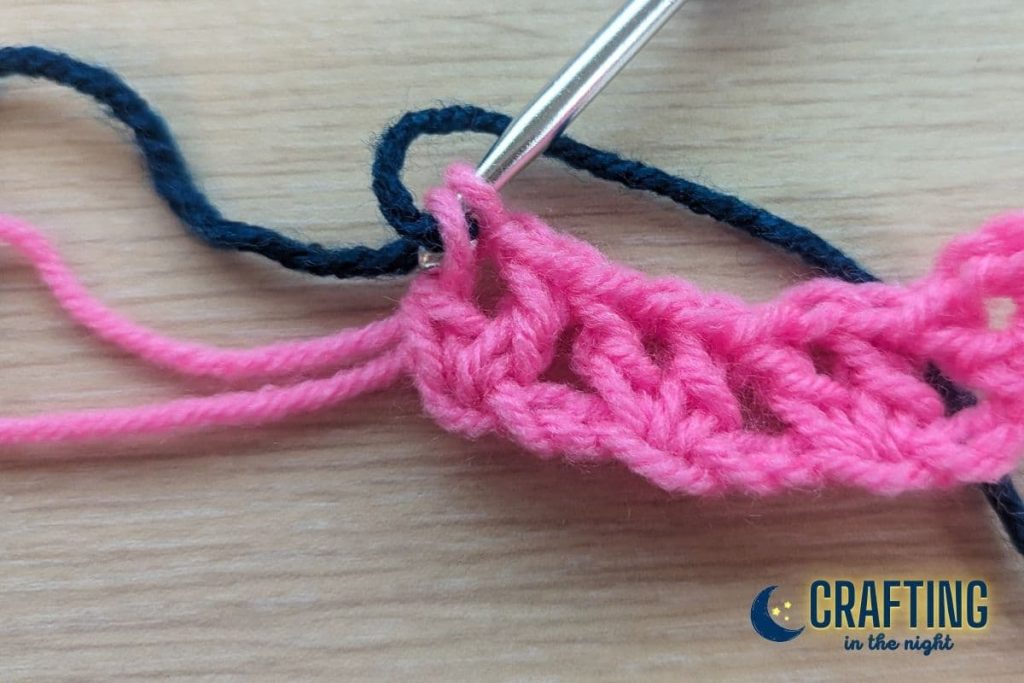
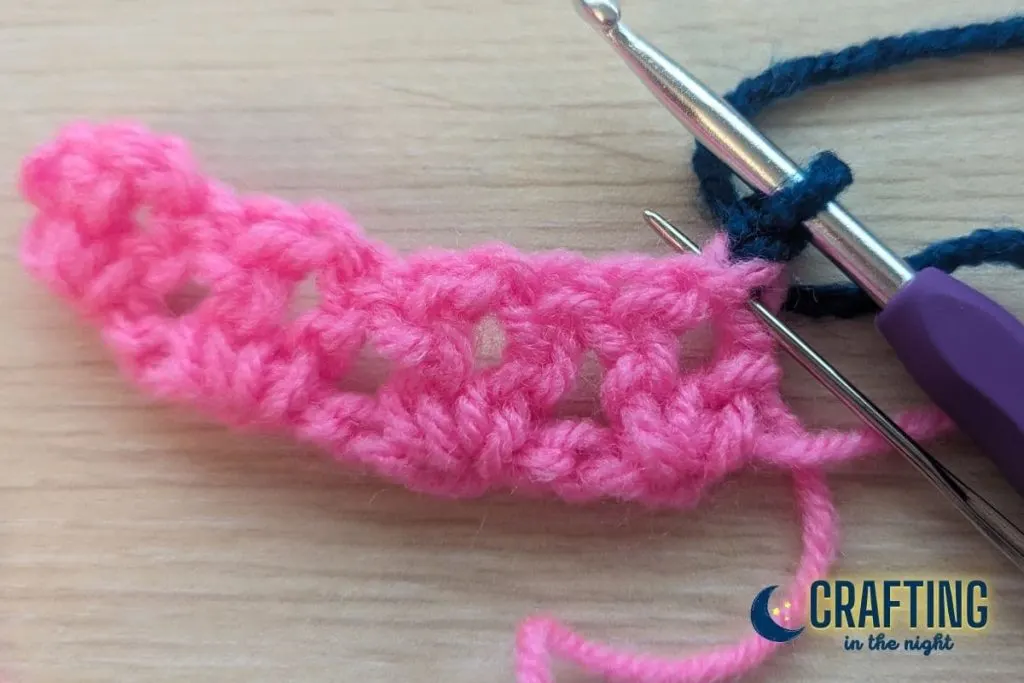
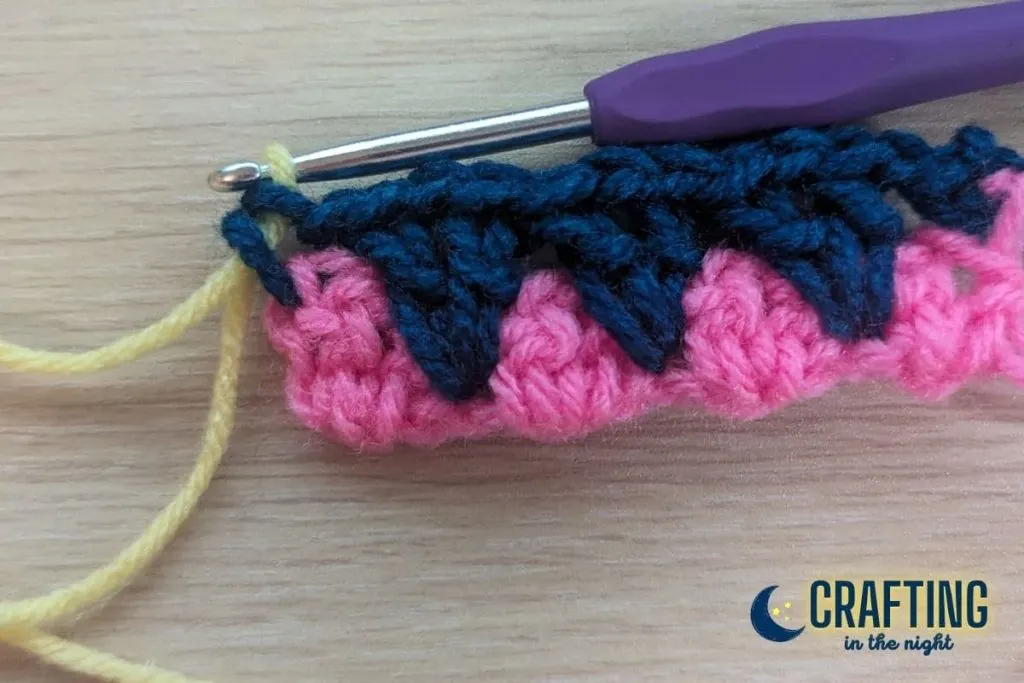
Row 4


Row 5