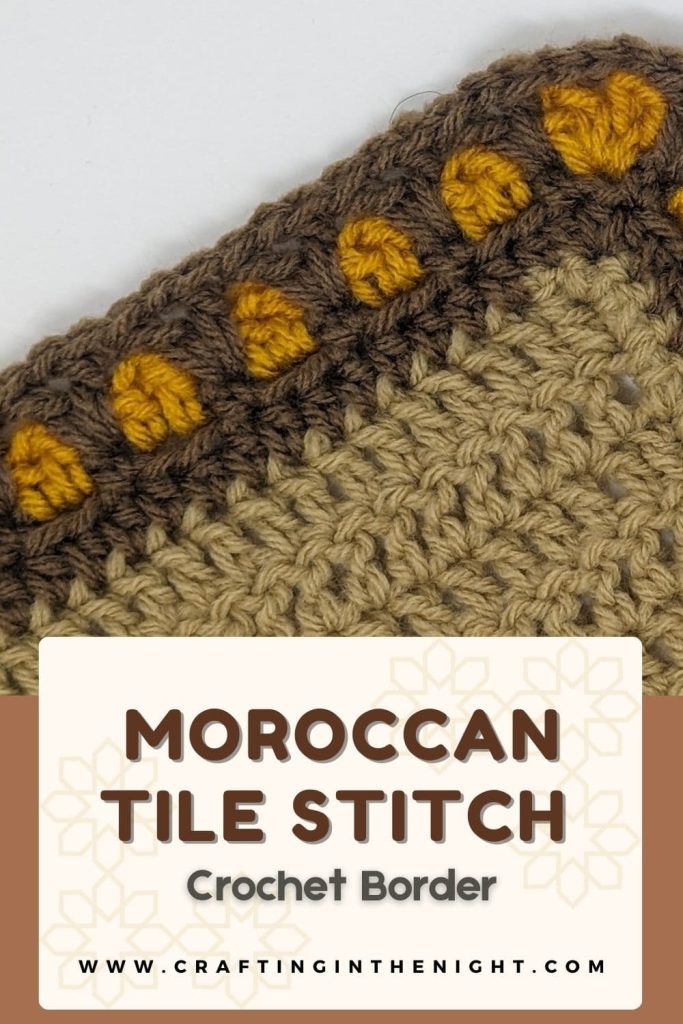
Add a splash of artistic flair to your crochet projects with the Moroccan Tile Stitch Crochet Border. This two-color design is not only quick and easy to master but also remarkably versatile, making it an ideal choice for both beginners and seasoned crocheters.

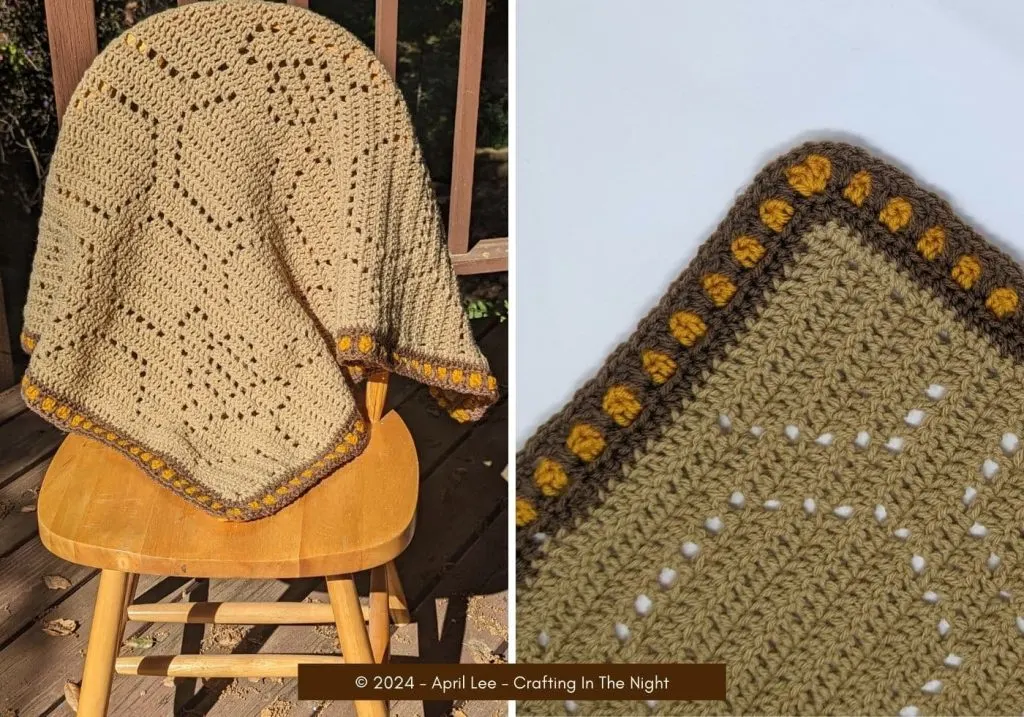
Inspired by the intricate patterns of Moroccan tiles, this border uses alternating rows of V-stitches to create a stunning window pane effect, where one color beautifully frames another. Whether you’re looking to enhance the edges of a cozy blanket, a chic scarf, or even a stylish bag, the Moroccan Tile Stitch offers both aesthetic charm and practical simplicity.
I thought this border would be perfect for the honeycomb filet crochet baby blanket I made for Project Linus.
Dive into this beginner-friendly technique and watch your crochet works transform into vibrant, eye-catching creations.

Moroccan Tile Stitch Border
Materials
- Color A – Red Heart Super Saver – Cafe Latte
- Color B – Red Heart Super Saver – Gold
- Size J (6.0mm) Crochet Hook (I love this set on Amazon.com)
Note: You can use any colors or type of yarn. Typically you’ll work this border in the same type of yarn and same size hook as the main project.

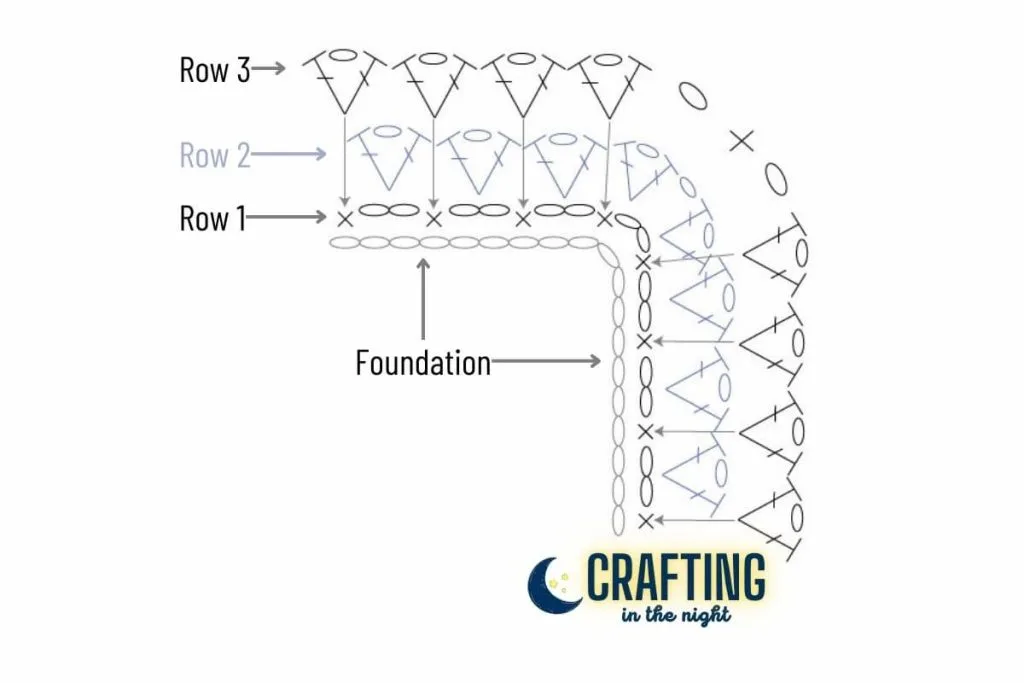
Stitch Diagram

Instructions
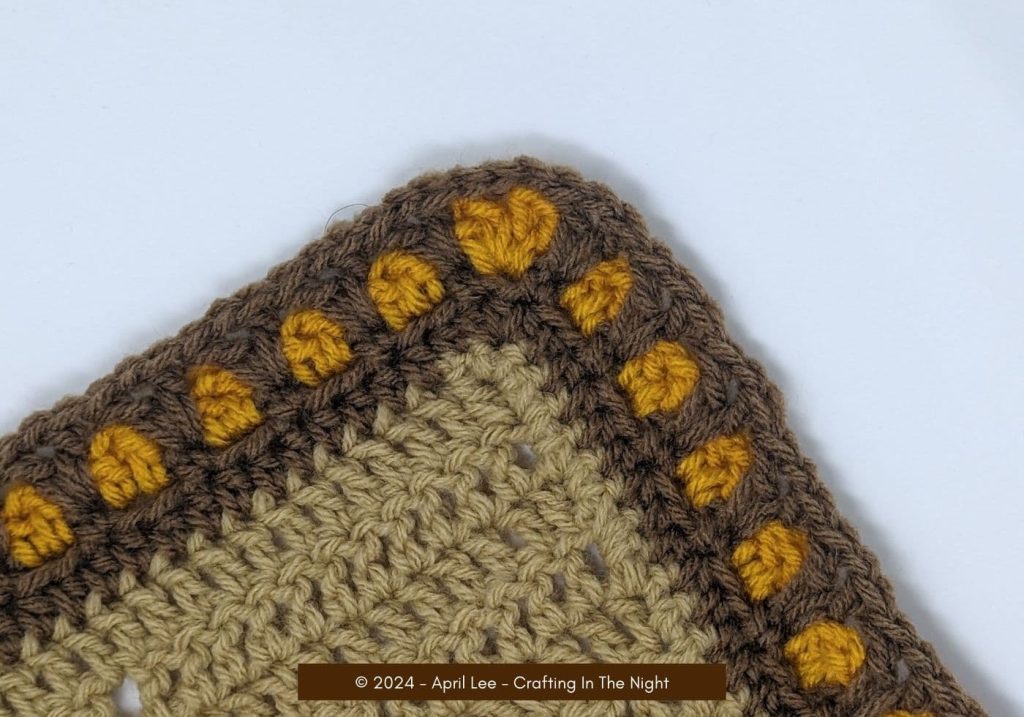
Ensure your blanket has an even starting edge. For this example, I edged my project in a single crochet all the way around, with 3 single crochets in the corners.
Multiple: In order for this pattern to come out “exact”, you would need to have each side of your work be a multiple of 3+1 including both corner stitches for that side. See the tips section at the bottom for information on adjusting if your starting base count isn’t exact on each side.
Round 1:
With Color A, join yarn in the corner stitch with a single crochet. Chain 2, single crochet in same stitch. *Chain 2, skip the next two stitches, single crochet in the next stitch.* Repeat from * until you reach the next corner stitch. Work single crochet, chain 2, single crochet, all into the same corner stitch. Continue working around. Slip stitch into your starting single crochet to finish off the round. Finish off with color A and weave in your ends.
Round 2:
Join color B with a slip stitch in any chain 2 space along one of the edges. Chain 4 (counts as first double crochet and chain 1), double crochet into same space. *Work V-stitch (double crochet, chain 1, double crochet) into next chain 2 space. Continue by working a v-stitch into every chain 2 space until you reach the corner. For the corner work v-stitch, chain 1, v-stitch, all into the corner chain 2 space. Repeat from * until you reach your starting chain 4. Slip stich into 3rd chain of starting chain 4. Finish off with color B and weave in ends.
Round 3:
Join color A with a slip stitch into any single crochet along the side of the project from round 1. Chain 4 (counts as first double crochet and chain 1), double crochet into same stitch. *Work V-stitch (double crochet, chain 1, double crochet) into next chain 2 space. Continue by working a v-stitch into every chain 2 space until you reach the corner. Chain 1, single crochet into the chain 1 space between the v-stitches in the corner. Work v-stitch in the next single crochet from row 1. Repeat from * until you reach your starting chain 4. Slip stich into 3rd chain of starting chain 4. Finish off with color A and weave in ends.


💡 Tips
- Stitch count optional – While a stitch count is given for this border, the reality is I never count my stitches before working a border. As you work the first row of the border, you can adjust at the corners by skipping one chain instead of two, or skipping two chains instead of 3. This should not have a drastic effect on your overall project.
- Start with a single crochet foundation row – Because you work row 3 into row 1, I find that having your row 1 single crochets worked into the top of a single crochet foundation row results in less stretching and gives a more finished appearance.
- Adding more rows – With a traditional Moroccan tile stitch, you work in rows back and forth and typically have more than the one row I have written up in this pattern. You could, theoretically, continue working the standard Moroccan tile stitch to increase border thickness but I haven’t tested that yet and am not sure how my adaptation of the corners would work out on multiple rows.
Share Your Work
Did you create a project based on this pattern? I’d love to see your creation. Tag me on Instagram or post a picture in my Facebook group!