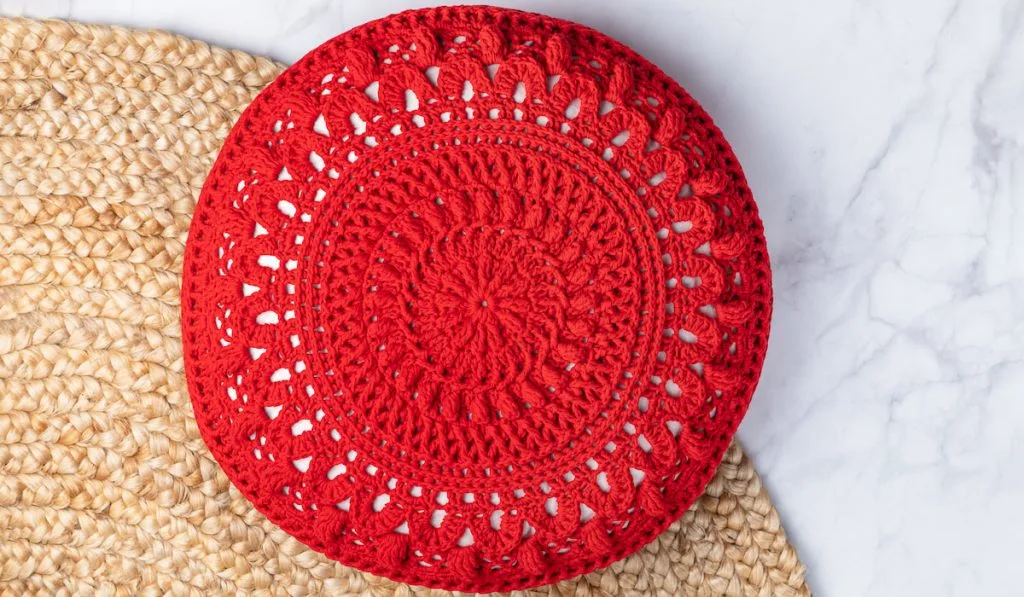
Sometimes, when you make crochet circles, you want them flat, not ruffled or dome-shaped. Unfortunately, things don’t always go your way, and you start wondering why your crochet circle won’t lay flat. The good news is, we might know why.
Why won’t my crochet circle lay flat?
Your crochet circle may not lay flat for various reasons.
For one, you may be using more or fewer stitches than necessary for each round of the stitch. You may also be using the wrong hook size. Then again, your gauge may be unsuitable for the stitch you intend to create.
There are many reasons why your crochet circle may not lay flat. Luckily, once you figure out the actual cause of your domed or ruffled crochet circle, you can fix the problem.
Below, we discuss reasons why your crochet circle won’t lay flat. We also go over how to fix crooked crochet circles and how to crochet a flat circle.

Why Won’t My Crochet Circle Lay Flat?
The following are some reasons why your crochet circle won’t lay flat:
1. You Are Using More Stitches Than You Need for the Circle
When you use more stitches than necessary in the rounds of your circles, you may end up with ruffles instead of a flat circle.
Since excess stitches have nowhere to go in the rounds, they bunch up, forming ruffles.
2. Your Stitches Are Not Enough for the Round
If you do not use enough stitches in the round of your crochet circle, the circle will form a dome.
The reason is simple – since the stitches are insufficient, they try to stay connected by pulling and stretching in two directions. Unfortunately, the design will curl as they do.
3. You Are Misinterpreting the Patterns
Under each standard (UK or US), the description of crochet patterns has different terminologies. So, when following a pattern, you must interpret it according to the original standard. If you don’t, you may end up with unconverted stitches. Unconverted stitches, in turn, will leave your crochet circle ruffled.
Say, for instance, you are familiar with the UK terms for patterns, but you want to work with a pattern written in line with US standards. You will have unconverted stitches if you interpret the pattern according to the UK standards you are familiar with. Consequently, your crochet circle will not lay flat.
4. You Chose Unsuitable Yarn
If the yarn you chose differs from the yarn the pattern recommends, your crochet circle may not lay flat.
For instance, you will have a crooked circle if the pattern recommends bulky yarn, but you use fingering weight yarn.
Since both yarn types have different widths, they cannot create the same designs with the same number of stitches. So, if you use one in place of the other, your stitches will either be too many or too few.

5. You Are Working With the Wrong Hook Size
Your crochet circle will skew if your hook is too small or too large for the yarn thickness.
6. You Are Using Different Stitch Heights for Each Round
If you vary your stitch height while working on your crochet circle without adjusting the number of stitches, your crochet may come out crooked.
Basically, if some of your rounds have single crochets and others have double crochets, you should adjust the number of stitches to accommodate the stitch heights. If you don’t, your crochet circle will not take shape.
7. Your Gauge Is Off
Your crochet circle may curl or ruffle if your gauge is off.
If your stitches are too tight, the crochet circle will form a dome. On the other hand, if your stitches are too loose, you may end up with ruffles.

8. Increasing or Decreasing the Stitches Inconsistently
If you leave the space between the stitches uneven when you increase or decrease, the circle may come out lumpy.
Basically, you will have more stitches in a small area if you increase. However, since these stitches cluster, they will have smaller interstitch spacing than other stitches. Consequently, the crochet circle will become lumpy.
On the flip side, you will have fewer stitches in a small area if you decrease. These stitches, in turn, will have larger interstitch spacing than other stitches. And this may make the crochet circle curl.
How to Fix Crooked Crochet Circles
As we said before, once you have figured out why your crochet circle does not lay flat, you can fix the problem.
Below, we discuss a few methods for fixing your crooked crochet circle:
1. Fixing More Stitches Than Necessary
When your crochet circle looks lumpy because it has too many stitches, fix it by frogging the affected round and stitching again. Of course, when you restitch, ensure you use fewer stitches.
2. Fixing Insufficient Stitches in the Round
If your crochet circle forms a dome because the stitches are not enough, frog the affected round and stitch again.
You can add more stitches by working two stitches in one stitch. Alternatively, you can make the spaces in the round more frequent and even.

3. Fixing Wrong Hook Size
Well, fixing this issue is pretty straightforward.
If the hook size you work with is too large for the yarn weight, you will have fewer stitches per inch. Consequently, the crochet circle will curl. To fix this, use a smaller hook.
If the hook is too small for the yarn weight, you will have more stitches per inch. As a result, your crochet circle may be lumpy. To fix this, work with a bigger hook.
4. Fixing Pattern Misinterpretation
If you are having trouble interpreting UK crochet terms to US crochet terms and vice versa, get a US v. UK crochet terms chart. You should be able to get one by doing a quick online search. Alternatively, you can check here for a chart.
5. Fixing Unsuitable Yarns
If you end up with fewer stitches than necessary because you used a bulky yarn, try adding some stitches to make your crochet circle flat.
On the flip side, if the stitches are more than necessary because you used a fine yarn, remove some stitches to make the circle flat.
Alternatively, you can revert to the specific yarn indicated on the pattern you are working with. Of course, this means you have to start all over.
6. Fixing Inconsistent Increasing or Decreasing
To fix this, even out the spaces between the stitches when adding or removing stitches. Whether increasing or decreasing, ensure the new stitches have the same interstitch spacing as the old ones.

7. Fixing an off Gauge
If you end up with a domed crochet circle, your first loop is loose, and the last one is tight. So, tighten the first loop and loosen the last one.
A ruffled crochet circle comes from having a tight first loop and a loose last loop. To fix this, loosen the first loop and tighten the last one.
How to Crochet a Flat Circle
Ordinarily, you might think that crocheting in rows will give you a flat circle. However, as you have already seen, things do not always happen this way.
Not to worry, we know how you can crochet a flat circle. Just follow these steps:
1. Create the First Round With the Right Number of Stitches
The first round of your crochet circle is the foundation for the other rounds, so you must choose the correct number of stitches for it. If you don’t, the crochet circle will come out crooked.
Depending on stitch height, the following is a guide for the number of stitches you need in the first round:
- A single crochet circle typically starts with 6 stitches. Then the number of stitches increases by 6 with each round. In other words, 6, 12, 18, 24, et cetera.
- A half-double crochet circle usually starts with 8 stitches. Then with each round, the number of stitches increases by 8. In other words, 8, 16, 24, 32, and so on.
- A double crochet circle typically starts with 12 stitches. Then with each round, the number of stitches increases by 12. In other words, 12, 24, 36, 48, and so on.
The incrementation for the stitches in each round is called the magic formula. It is essential to stick to it and pull it off correctly if you want a flat circle.
2. Pulling off the Magic Formula

To pull off the magic formula correctly, you must know where and how to increase each round. Thankfully, this works the same way for all the stitch heights we mentioned before.
- Start the first round using the number of stitches recommended above.
- In the second round, crochet 2 stitches into every first round stitch.
- In the third round, create 2 stitches into each of the first set stitches of the second round. Then make 1 stitch into each of the second set of stitches of the second round.
- In the fourth round, create 2 stitches into each of the first set stitches of the third round. Then make 1 stitch into each of the second and third sets of stitches of the third round.
- In the fifth round, create 2 stitches into each of the first set stitches of the fourth round. Then make 1 stitch into each of the second, third, and fourth sets of stitches of the fourth round.
- In the sixth round, create 2 stitches into each of the first set stitches of the fifth round. Then make 1 stitch into each of the second, third, fourth, and fifth sets of stitches of the fifth round.
Keep going this way until you completely crochet your circle. With every round, you should have 1 more set of stitches from the previous round to make 1 stitch into. So, by the tenth round, you should have 8 single stitches, and by the 20th round, you should have 18 single stitches.
While stitching each round, keep count of your stitches to ensure you are doing it right. Remember, the stitches in each round should increase by the number of stitches you had in the first round.
So, if you had 6 stitches in the first round, the second round should have 12 (6+6) stitches, and the third should have 18 (12+6). This should keep going until you have completed your circle.
Final Thoughts
The most likely reason your crochet circle will not lay flat is excess or insufficient stitches per round.
This could happen because you used an unfitting hook size or yarn weight. It could also occur if your loops are too tight or too loose.
